
Data-driven prototyping using Reforge Build
Product teams need prototypes that are tools, not toys. Learn how to level up your prototypes using a data-driven approach.

Today, I’m excited to tell you about the launch of Reforge Build. It solves an important problem for product teams who want to use prototyping to ship better products. The lofty promise: incorporate working software into every stage of product discovery. The reality: teams struggle to create prototypes that are useful research and decision-making tools. They end up with prototypes that look cool but ultimately disappoint. In this post, I’m going to walk you through a technique to build better prototypes.
At Tripadvisor, trip planning was one of the hardest features I worked on. Trip planning is deeply personal—everyone does it differently. We ran research sessions with travelers to understand their workflows. Several showed up with dog-eared notebooks scrawled with handwritten notes and stuffed with Post-its.
The notebooks told us everything we needed to know about what people wanted. But our paper prototypes couldn’t capture the dynamic reality of trip planning—the back-and-forth between travelers, the way plans evolved as people added ideas, the messiness of group decisions.
Today, we could put a working prototype in front of those travelers in an afternoon. That would have accelerated our learning and gotten us to the right solution weeks faster.
Vibing our way to a prototype…
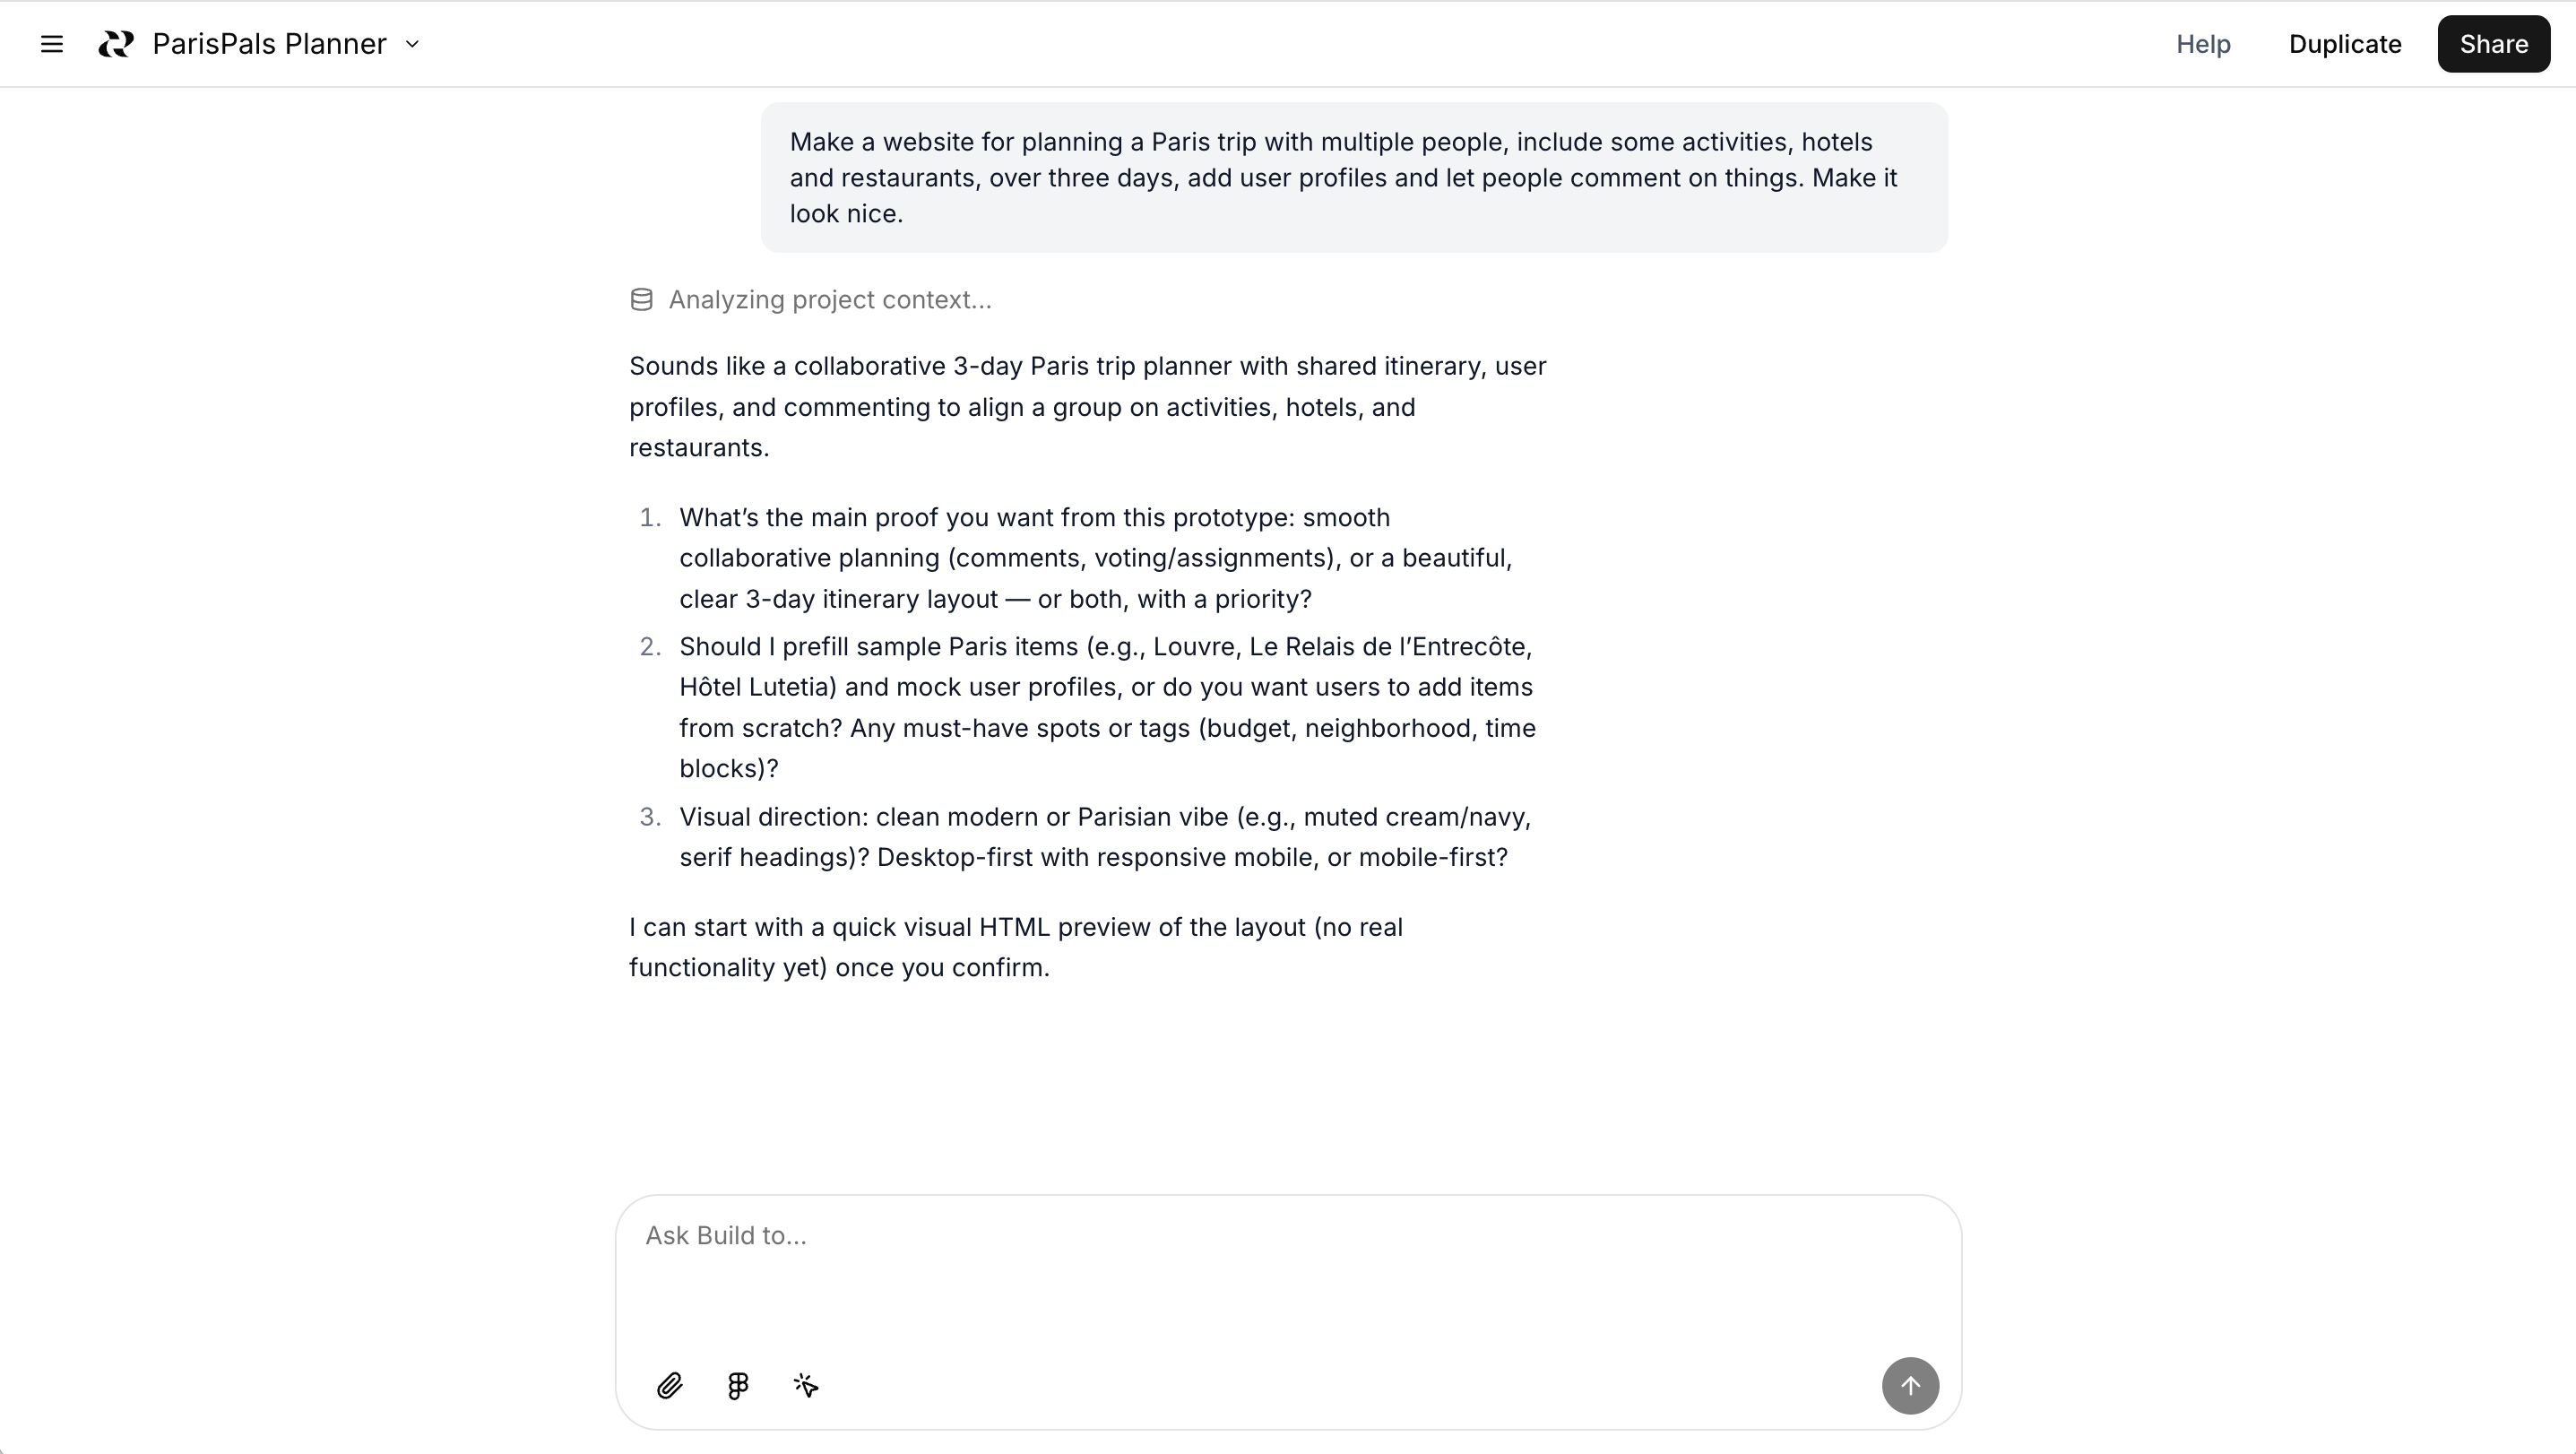
Let’s start with a simple prompt:
Make a website for planning a Paris trip with multiple people, include some activities, hotels and restaurants, over three days, add user profiles and let people comment on things. Make it look nice.I know, I know. This is phoning it in. Reforge Build thinks we can do better and asks me some follow-up questions:
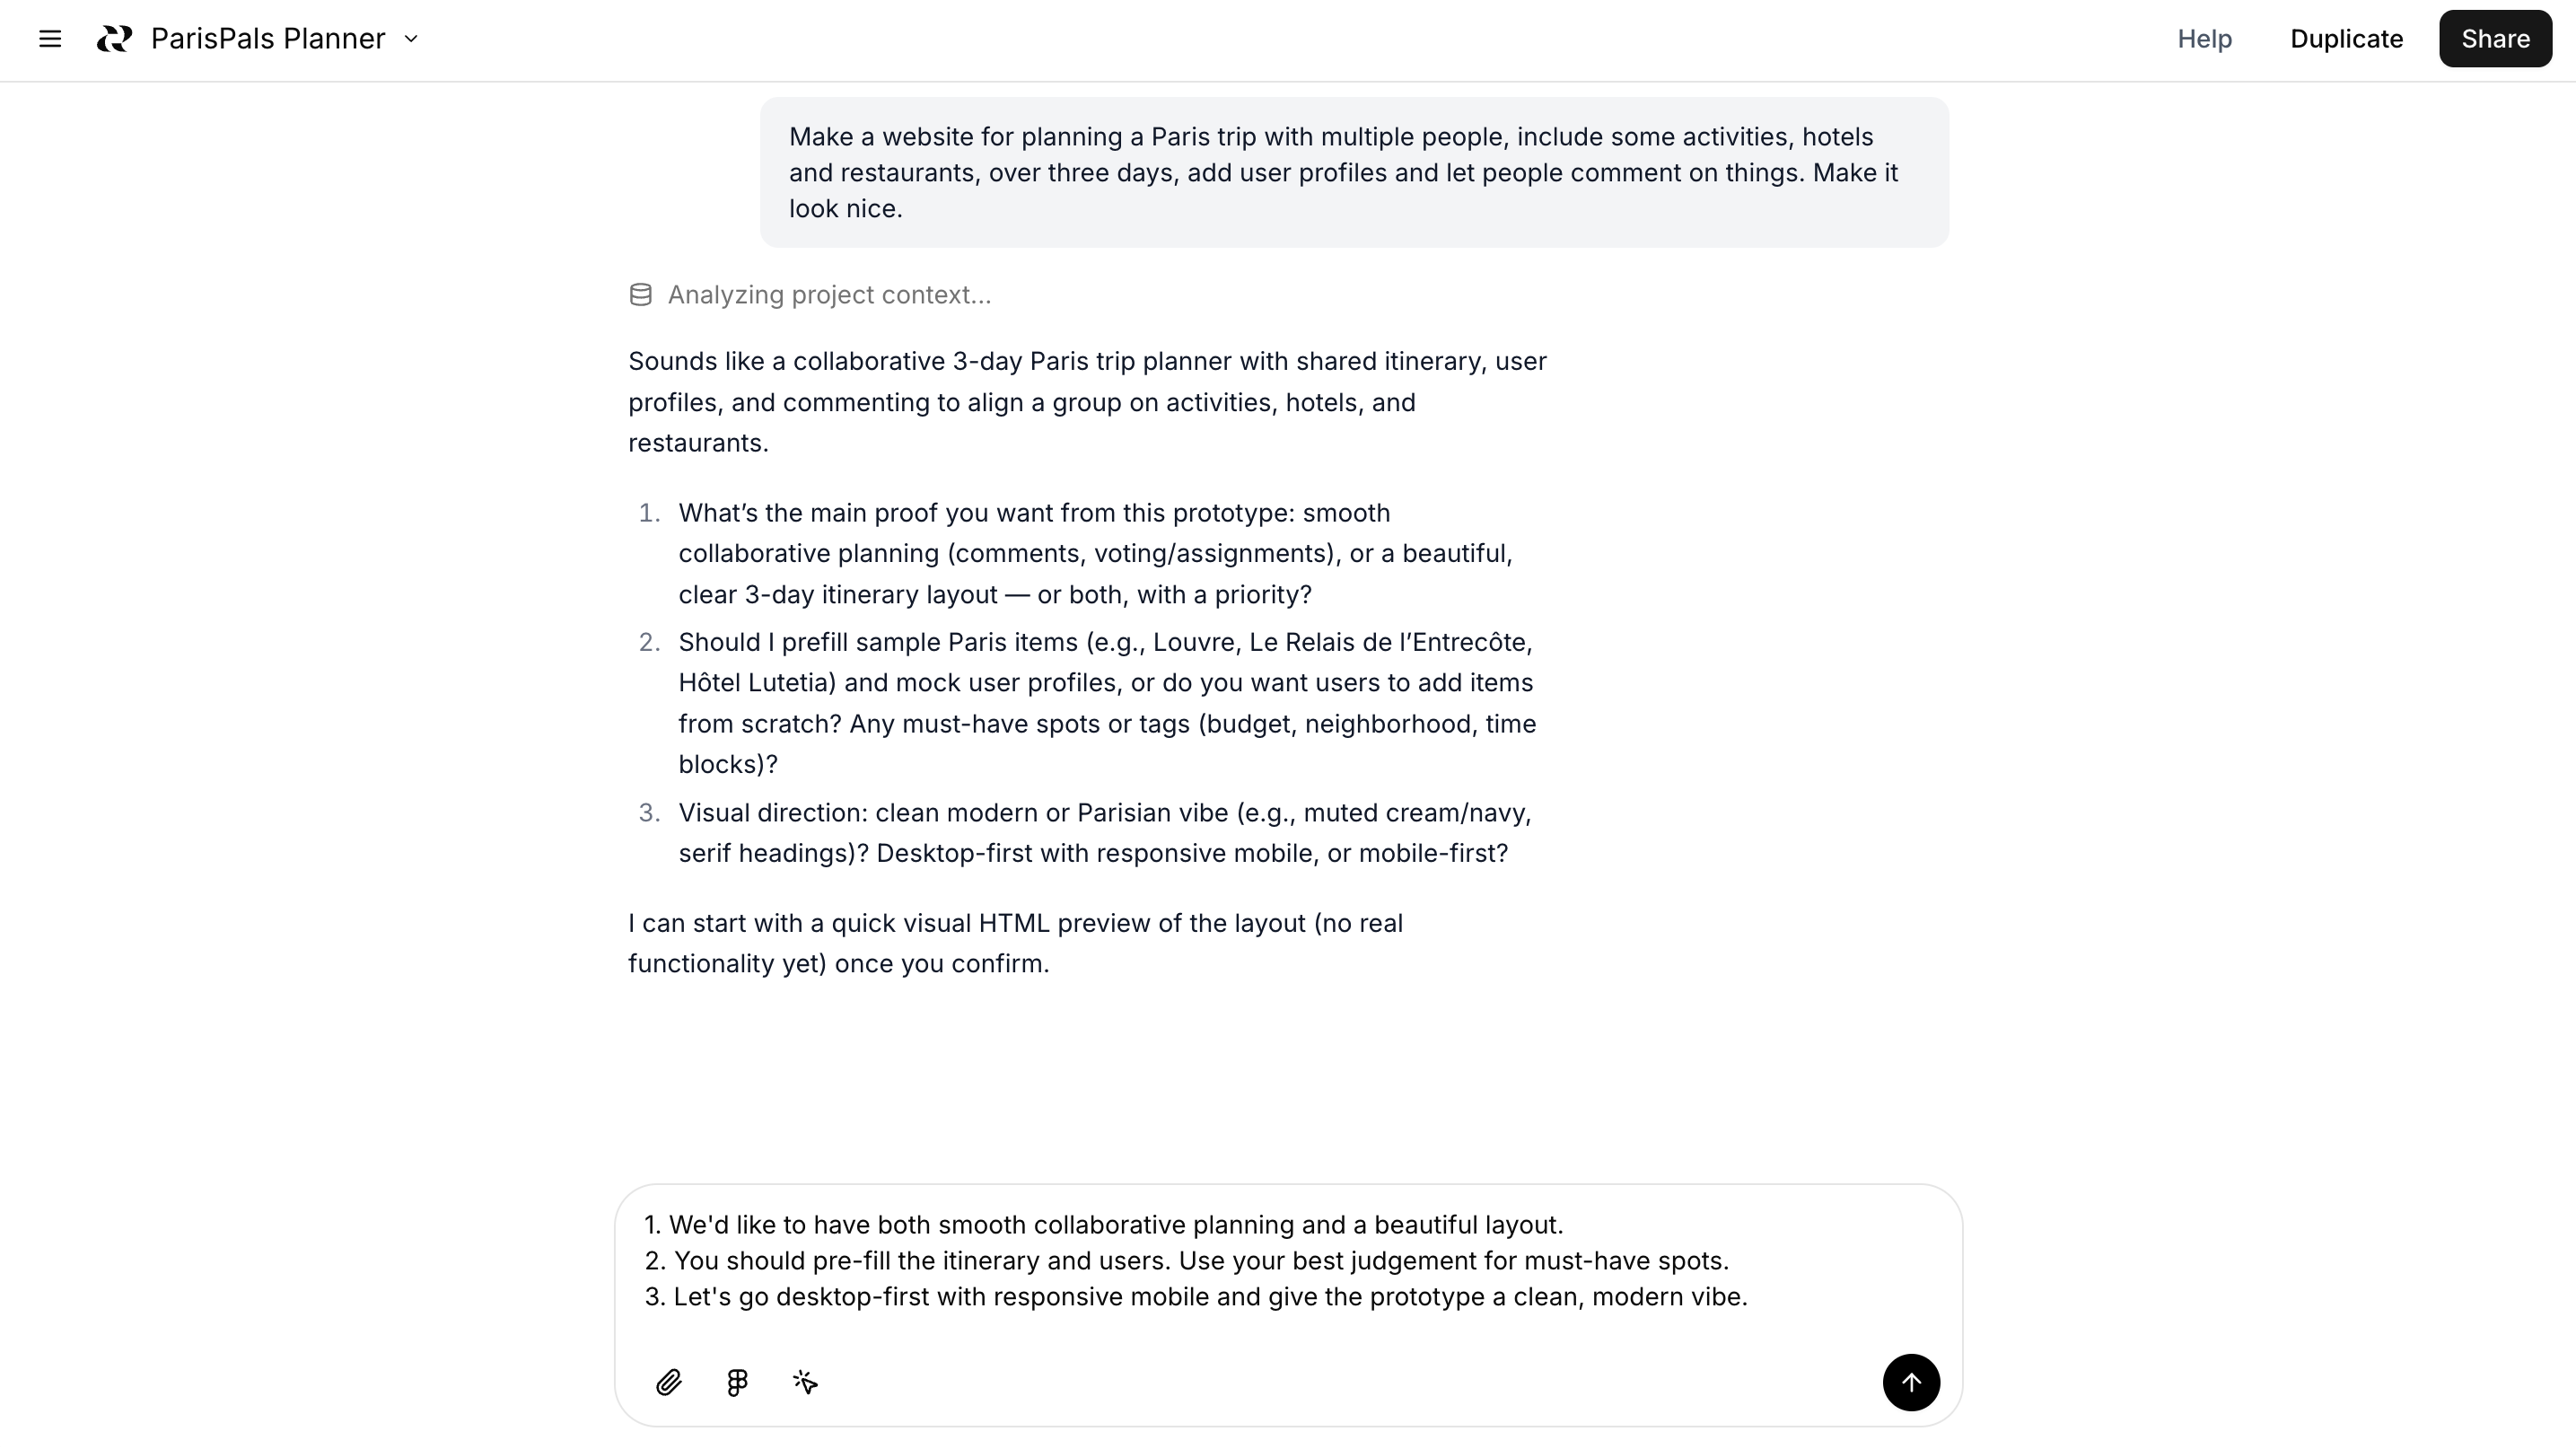
I comply:
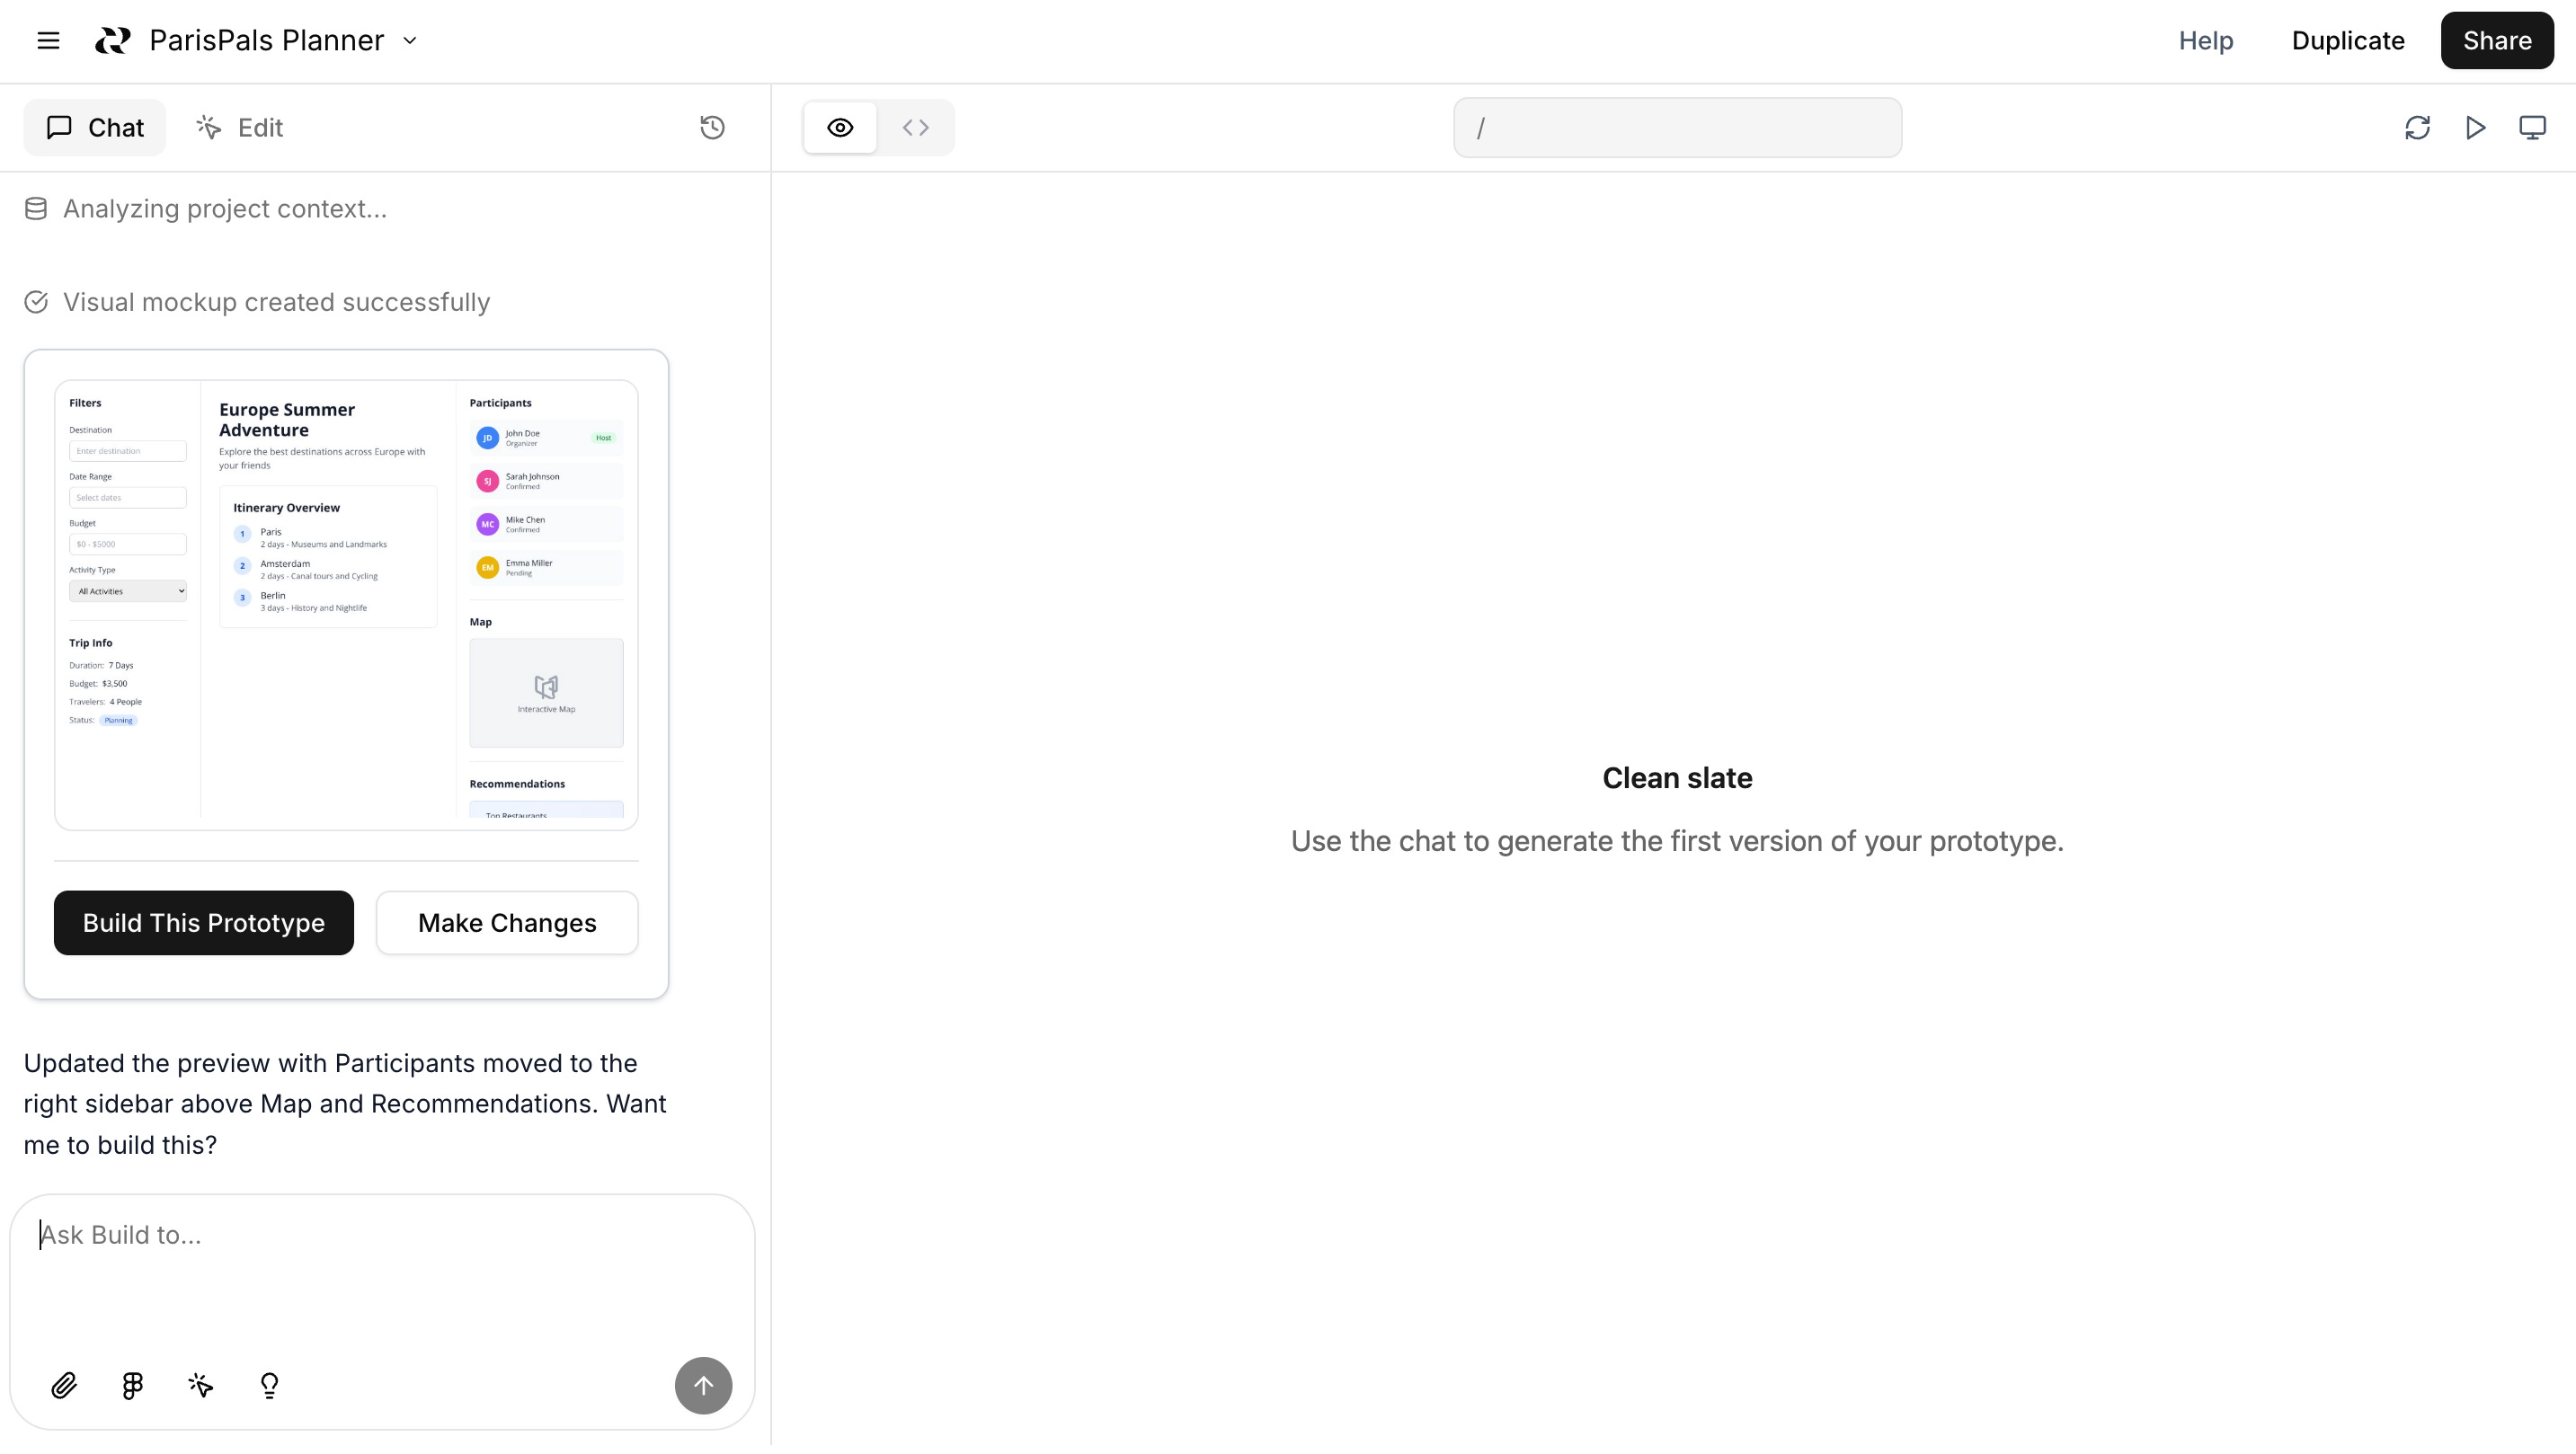
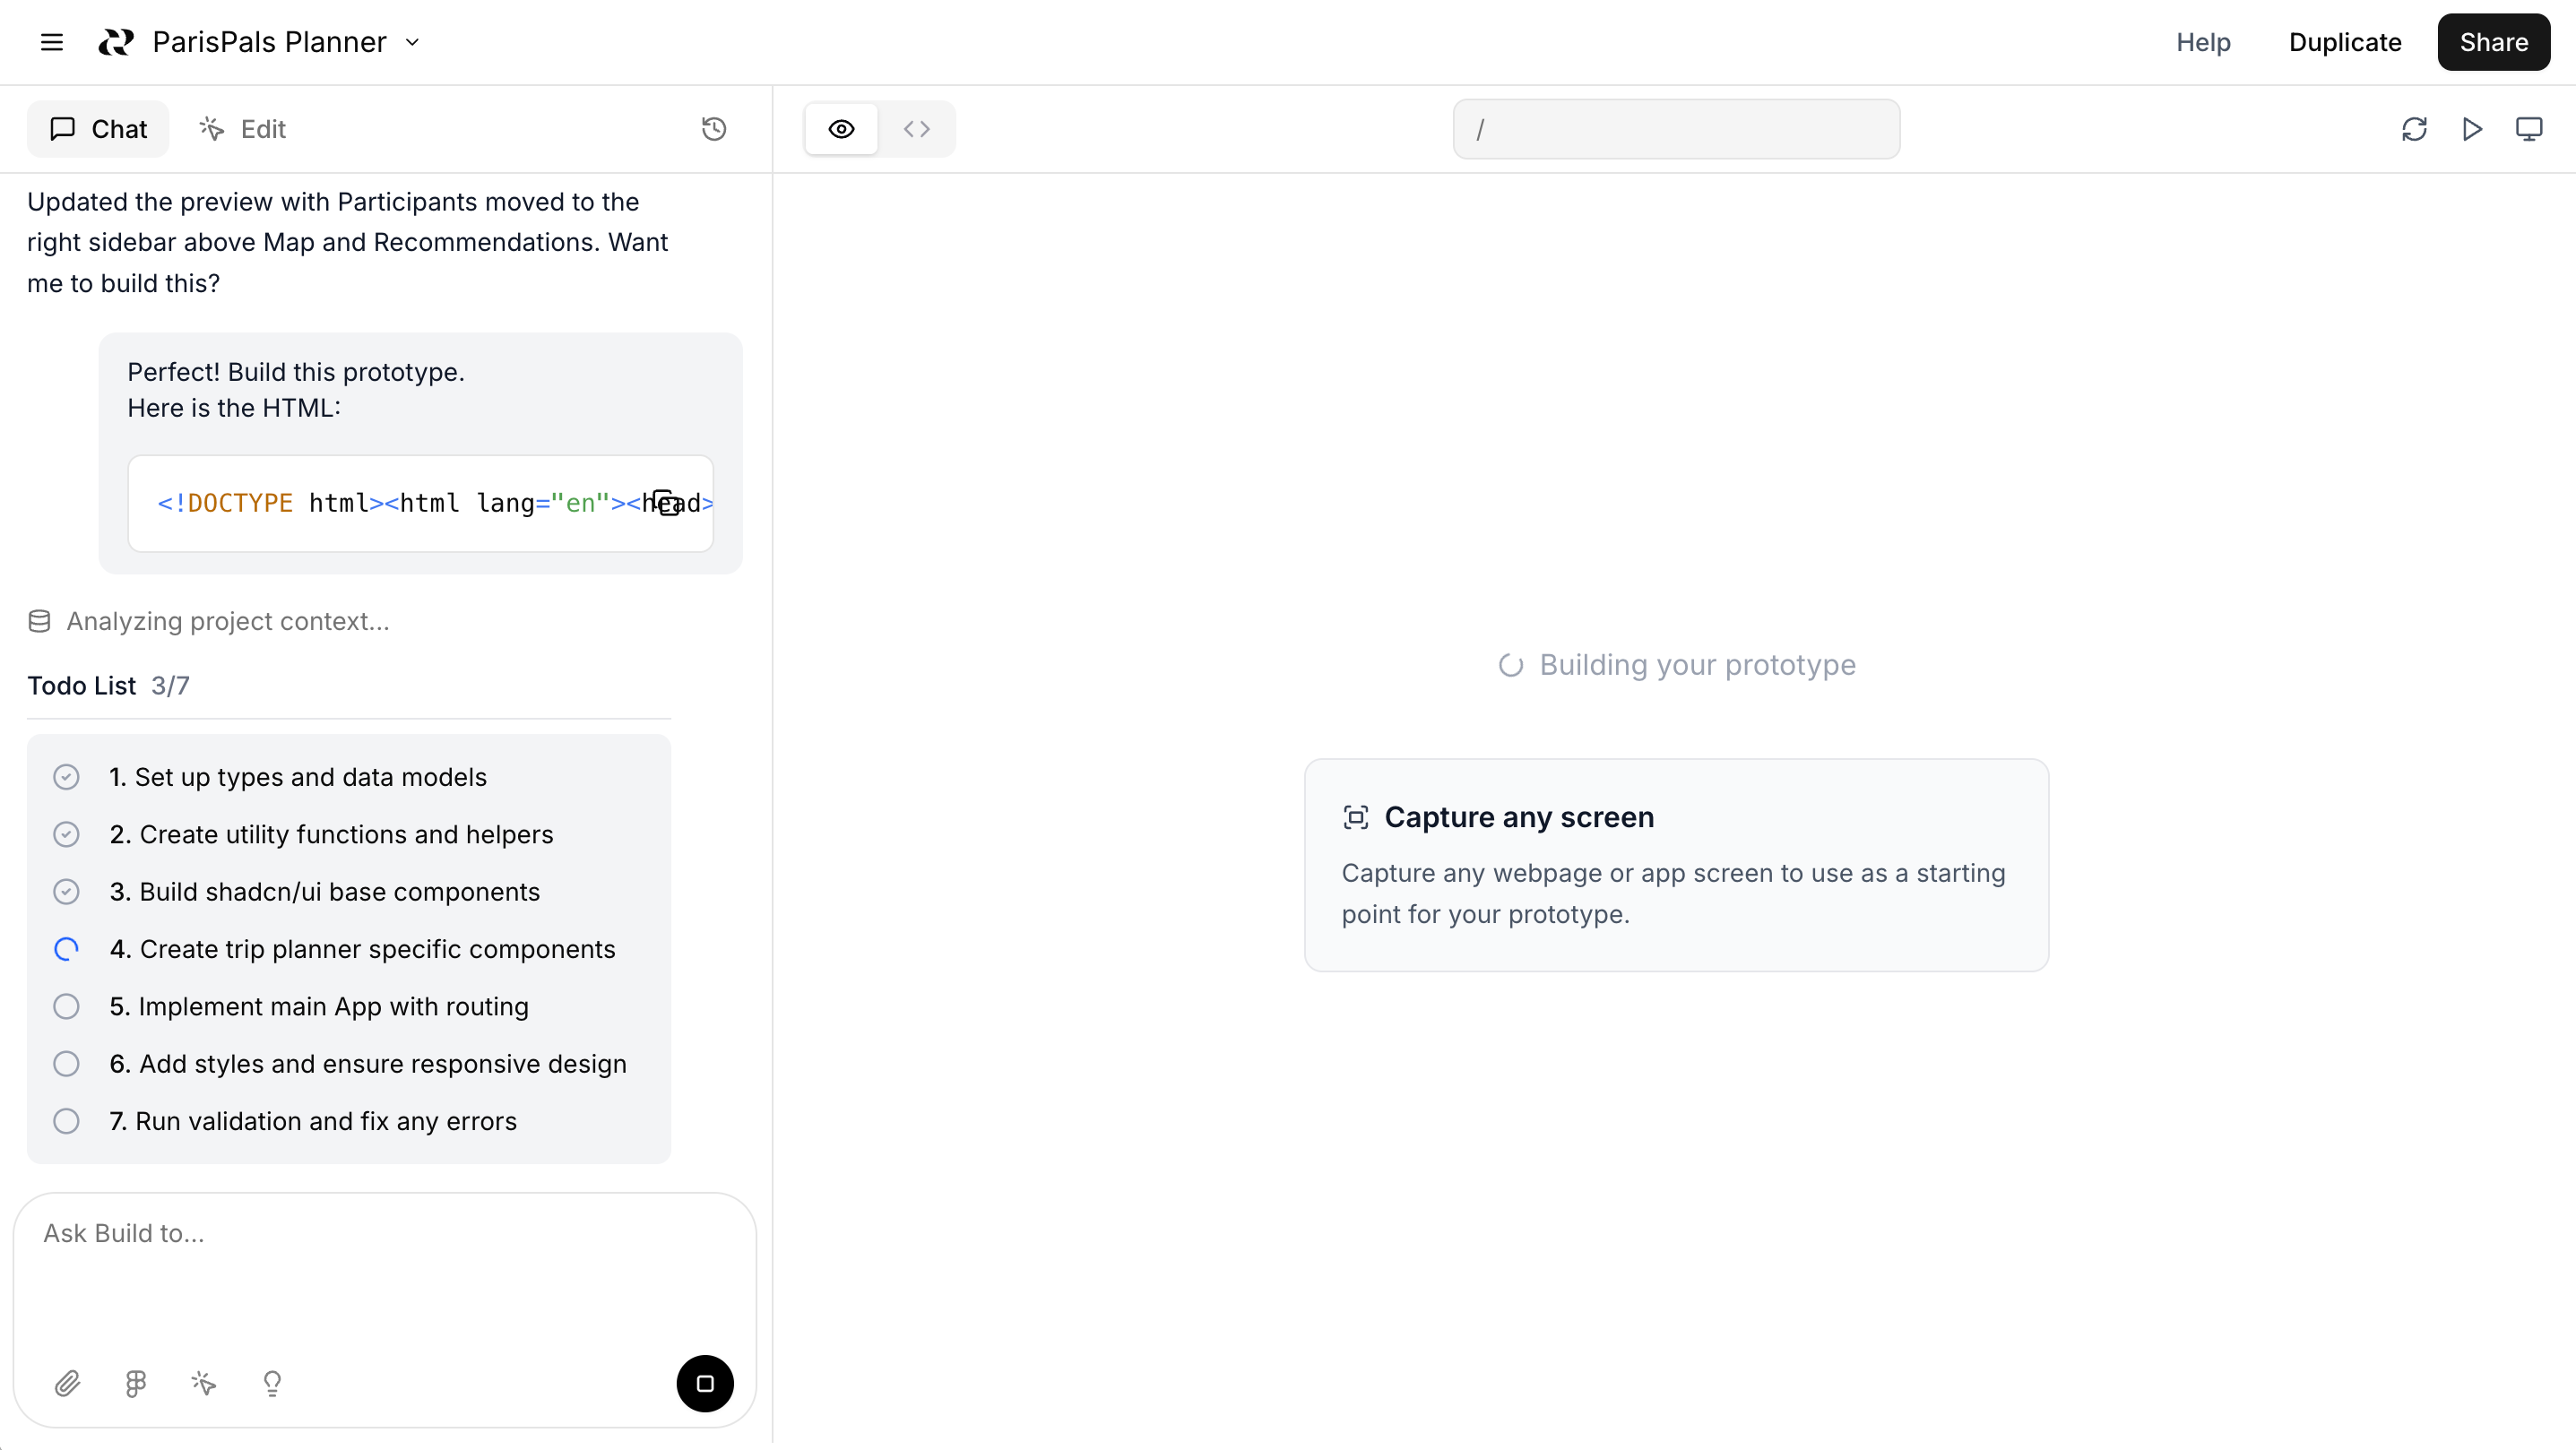
Next, Reforge Build shows me a preview. Building the full prototype will take some time, so this visual preview allows me to quickly iterate on the design before jumping into the full build.
I’ve asked Reforge Build to move the participants to the right:
Reforge Build creates a detailed plan and starts an in-depth build process:
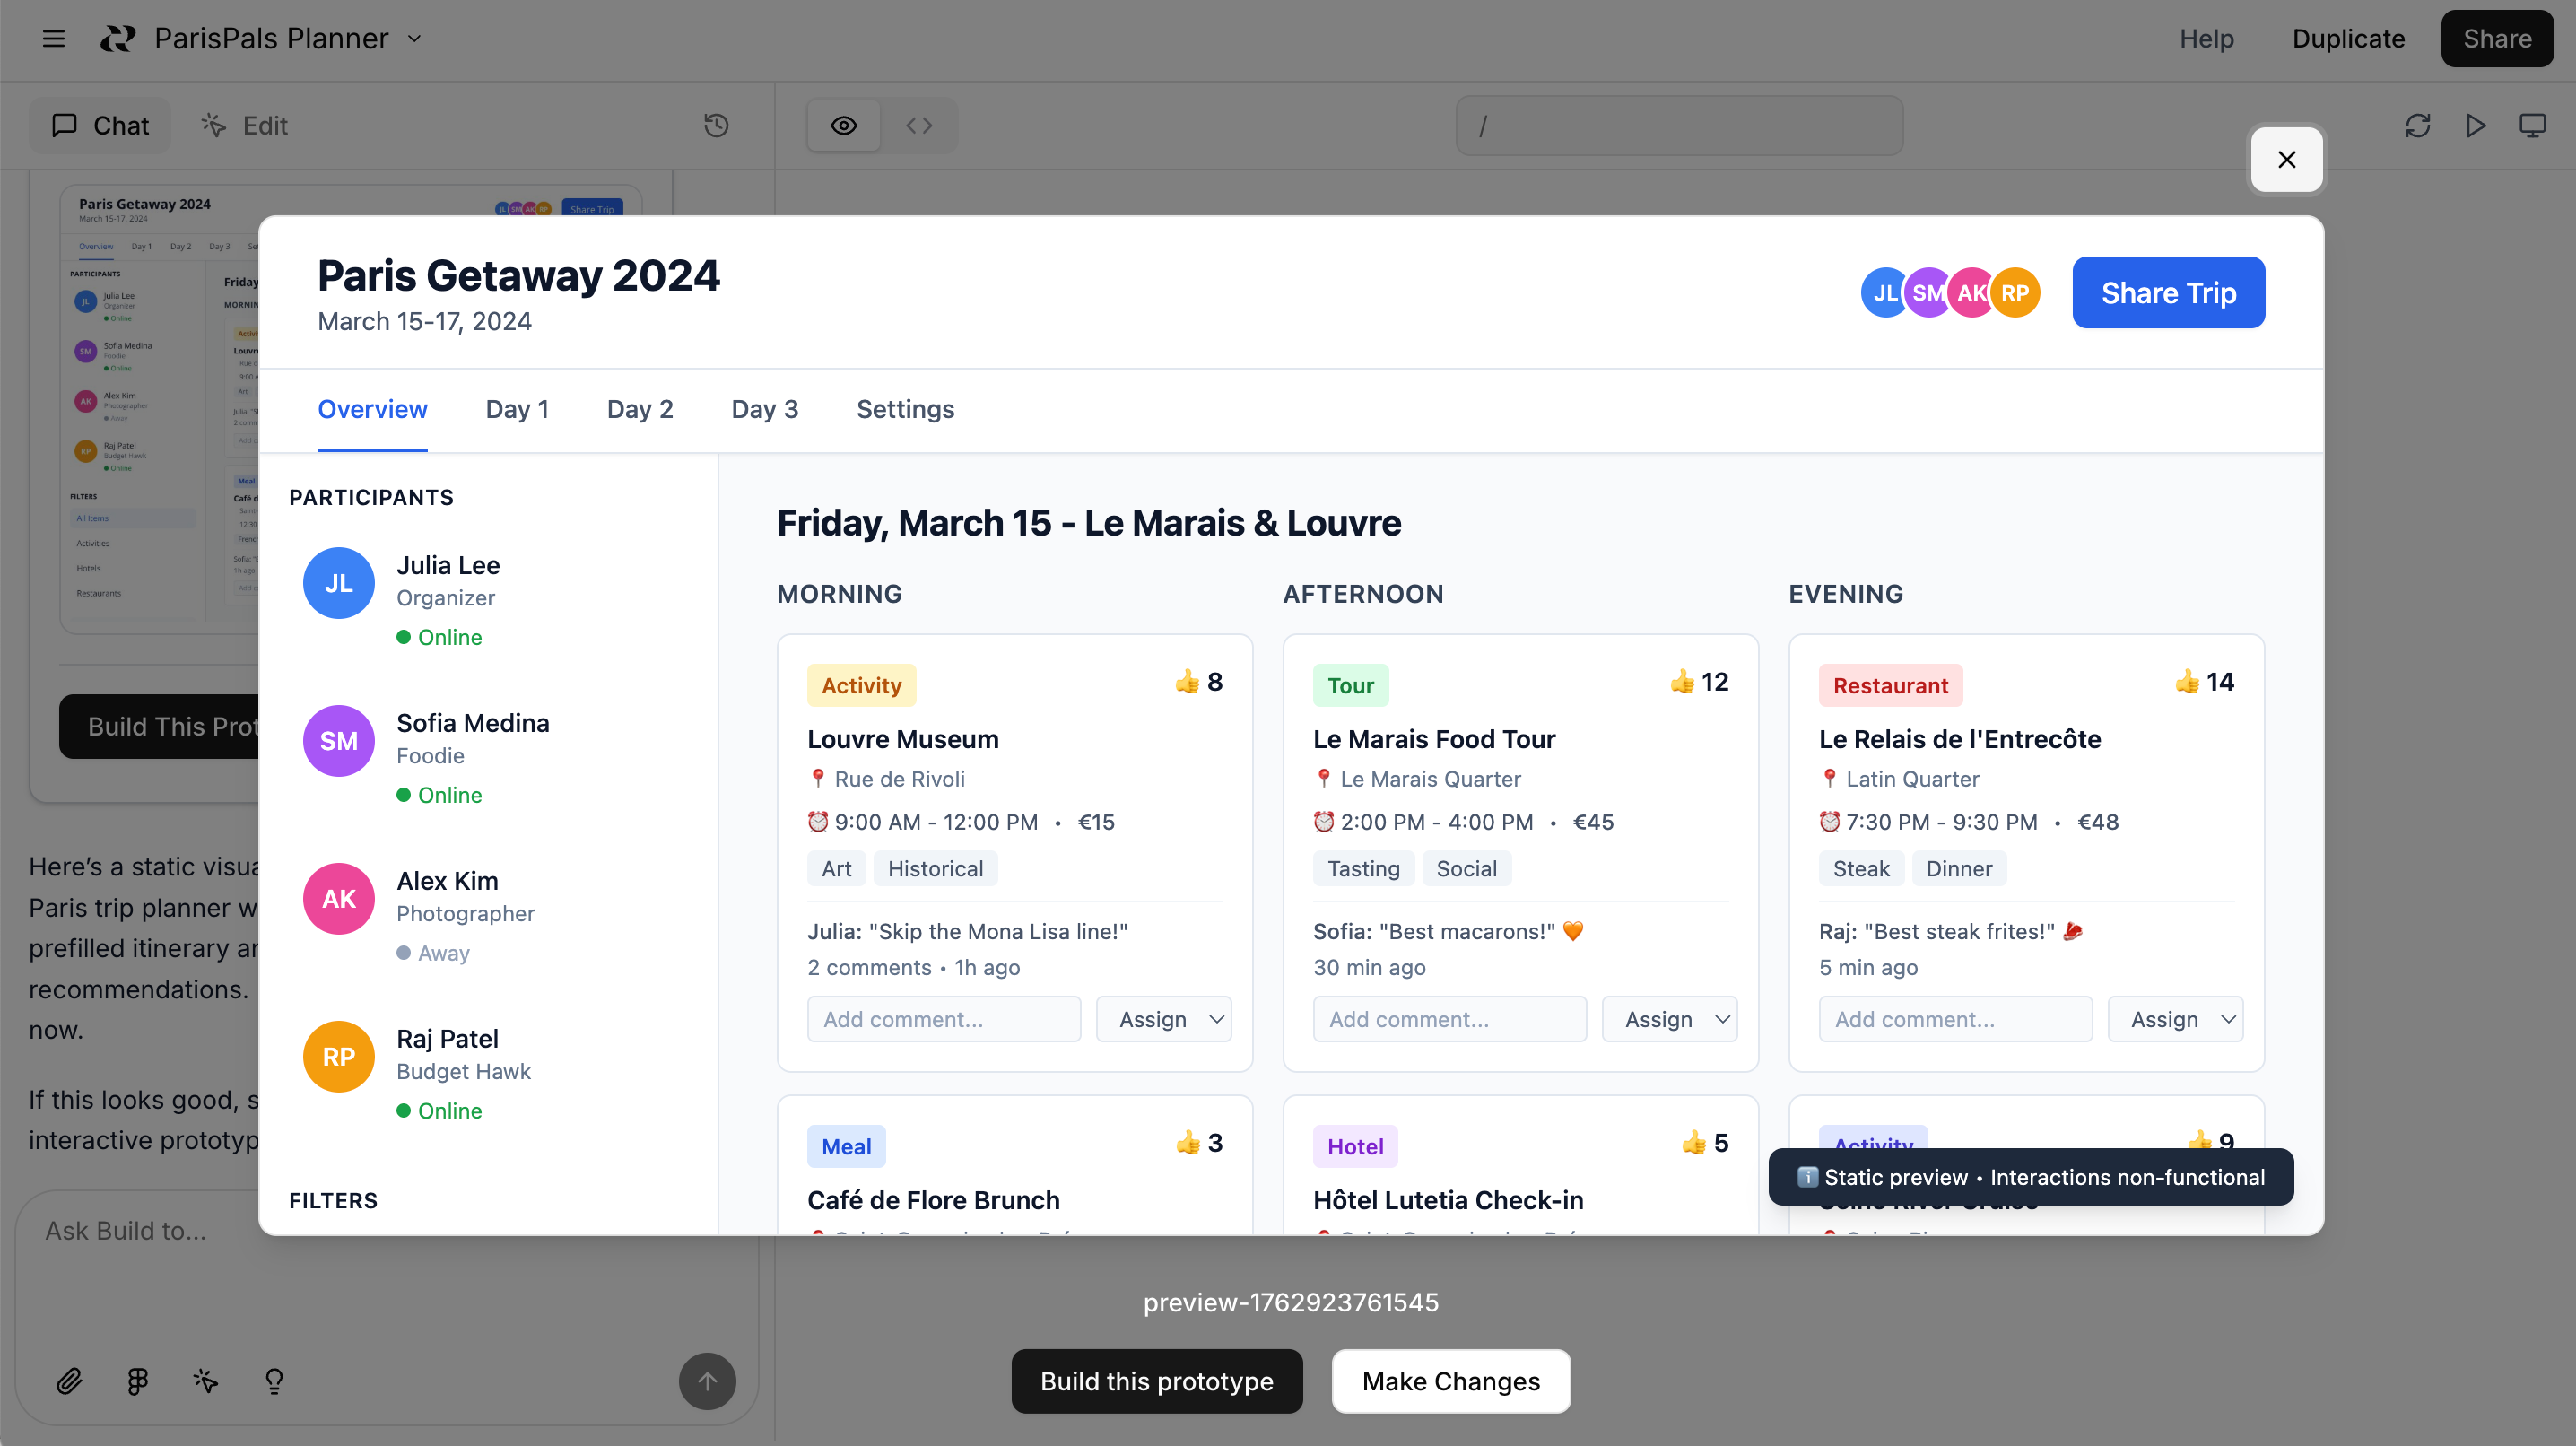
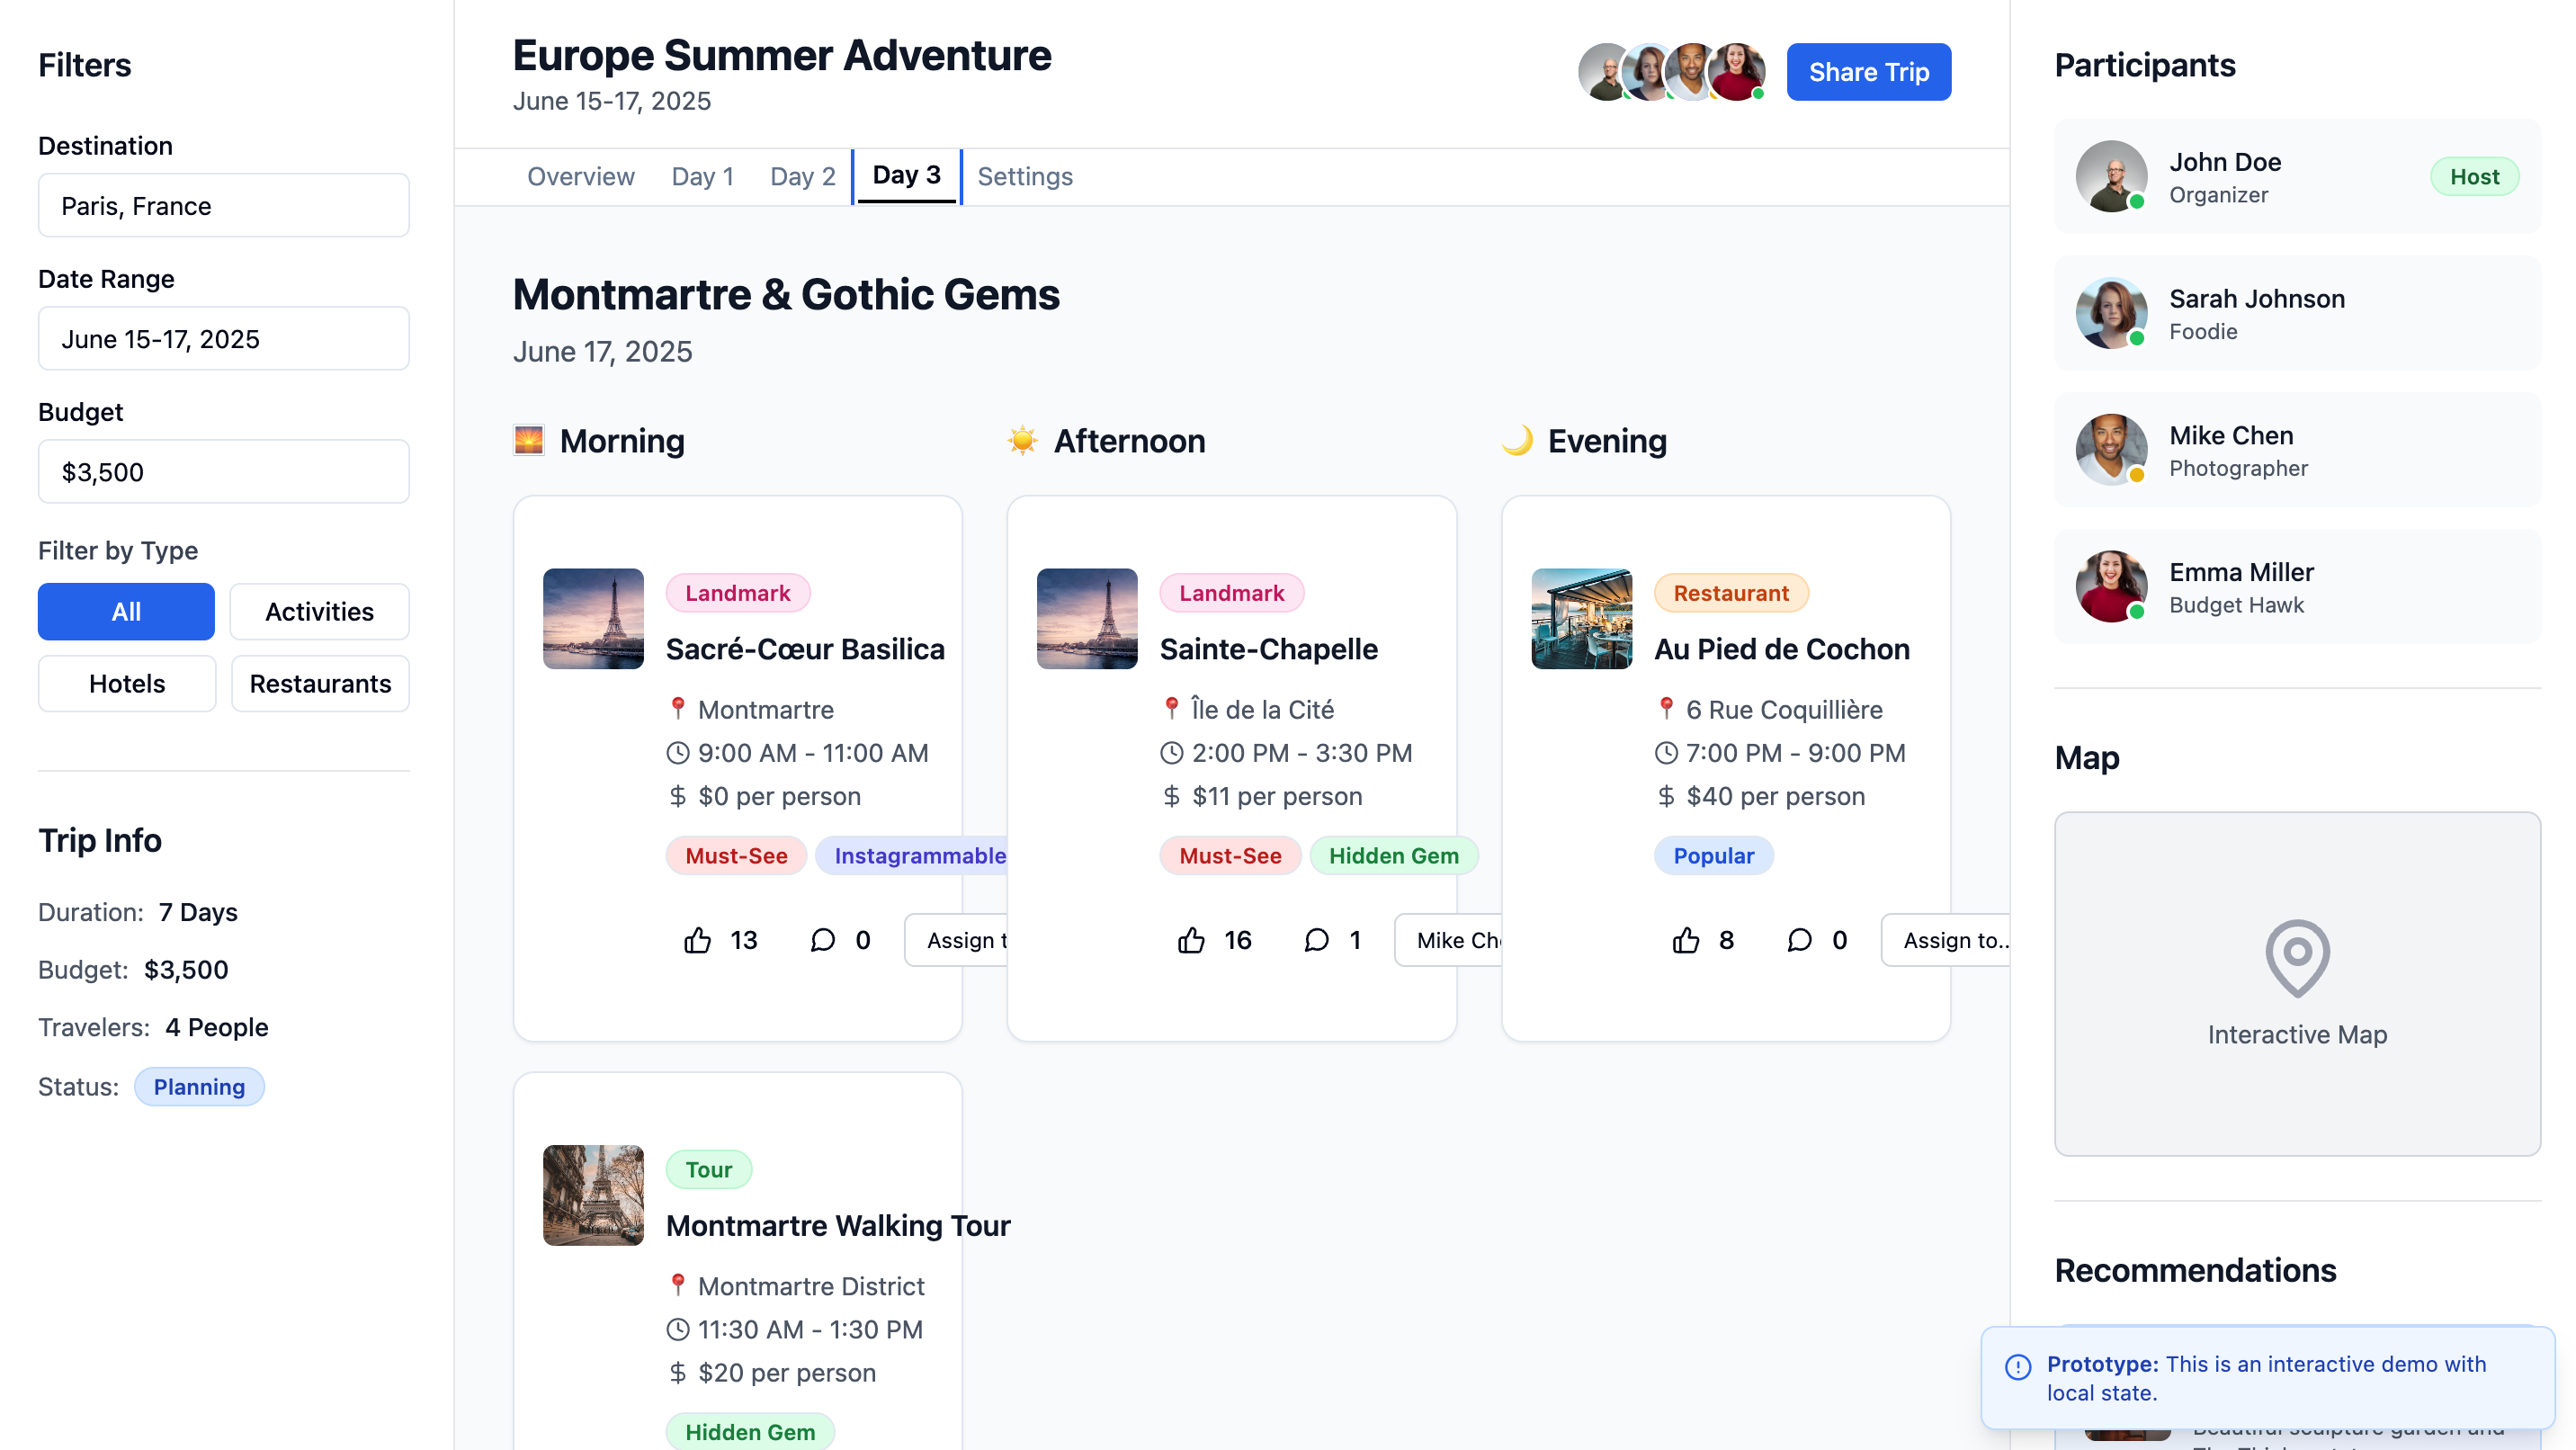
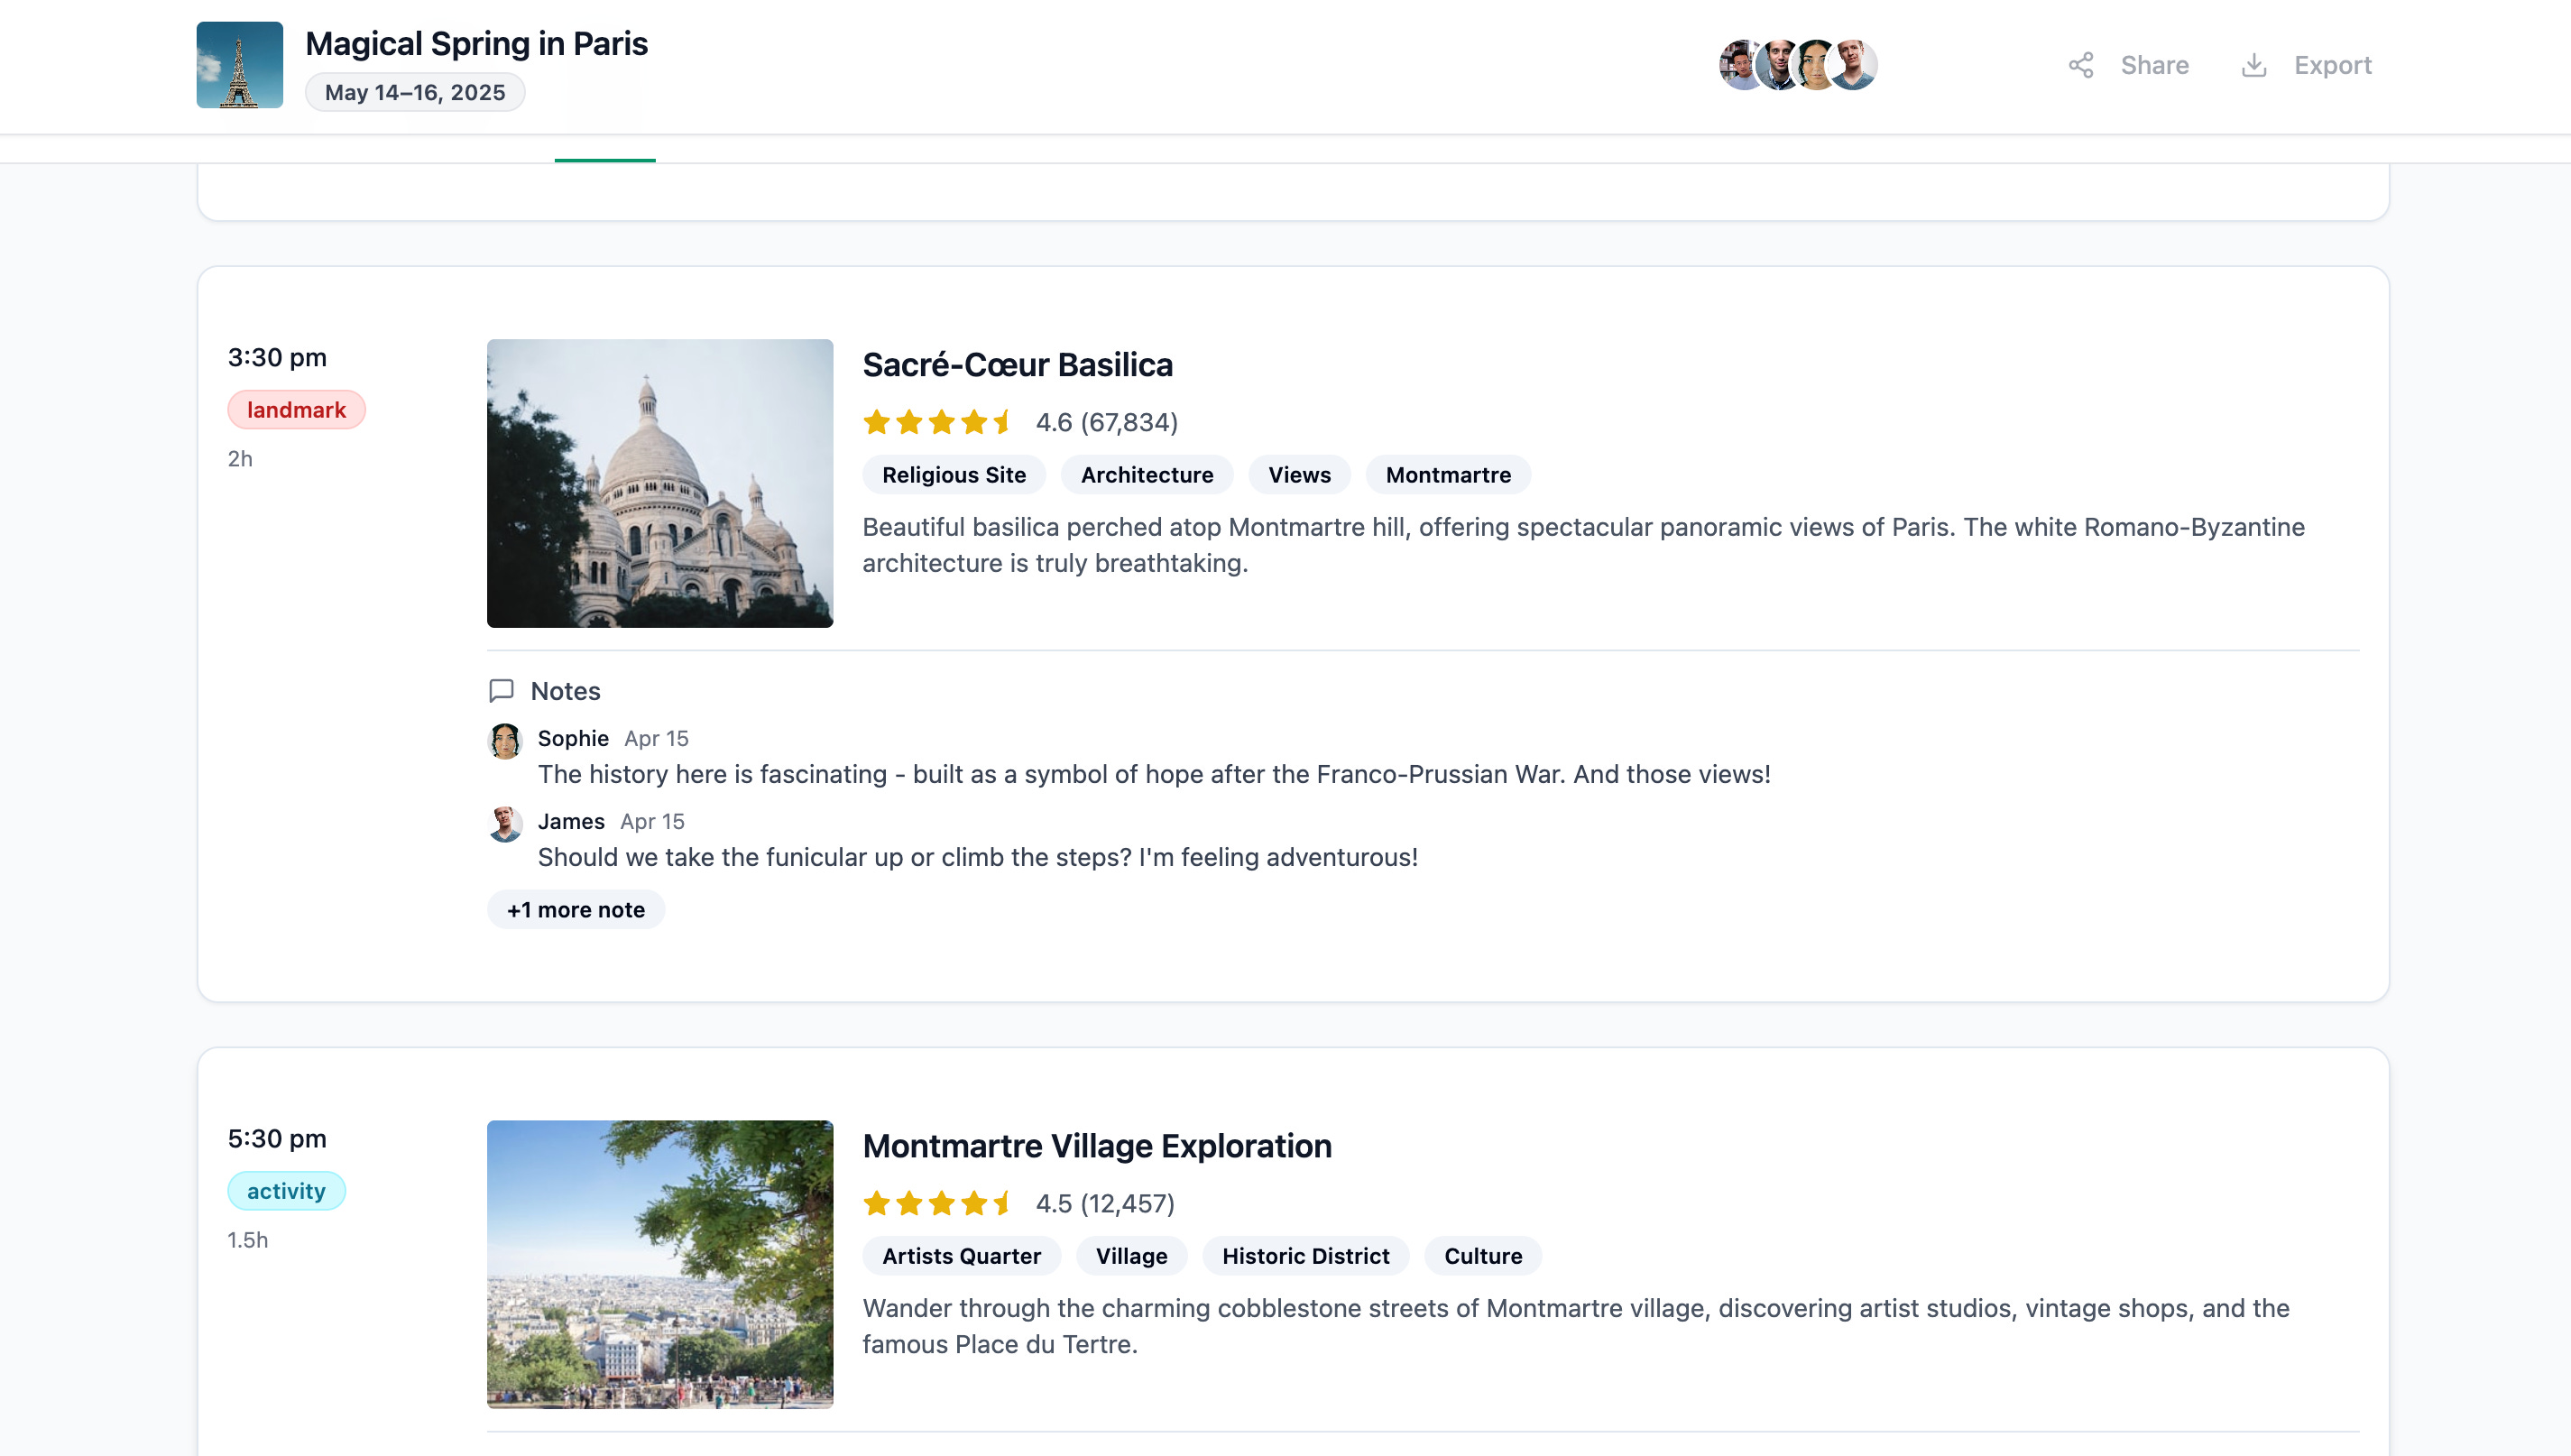
And here is the first version of our prototype:
The trouble with “vibe prototyping”
We’ve actually gotten a remarkable result considering how little effort we put into the original prompt, but could we put it in front of users?
There are some layout issues which we could fix with some prompting, but there is also a deeper issue. A photo of the Eiffel Tower is used for the Sacré-Cœur Basilica and Sainte-Chapelle. This discrepancy ruins the “suspension of disbelief”. Put this in front of a user during testing, and they immediately know it’s fake. They stop engaging naturally with the experience.
Your research is compromised before it begins.
There’s another issue. The prototype is inflexible. Want to test it with a traveler who is planning a trip to Thailand instead of Paris? You have to start over completely. Different destination, different prompt, different prototype.
This is the difference between a toy and a tool. Toys are cool demos that impress for 30 seconds. Tools are decision-making artifacts that help you ship better products.
Why “vibe prototyping” falls short
When you ask AI to “make a trip planning website,” you’re asking it to simultaneously:
Figure out the UX (what screens, what interactions)
Design the visual look (colors, typography, layout)
Create the data model (what fields, what relationships)
Generate realistic content (names, photos, descriptions)
It’s like asking one person to be designer, PM, engineer, and content writer at once—all with very little guidance. The result? Average across the board.
Taking your prototypes to the next level
A prototype is a tool to help you make better decisions about what to build.
Usually, that means we need to put them in front of fickle customers. So, your prototype needs to look and behave like your actual product. A good prototype fulfills three types of requirements:
Design requirements: The prototype looks like your product and seamlessly extends your visual language. Users should feel like they’re interacting with your actual product, not a generic template.
Functional requirements: The prototype behaves like your product. If your product has certain patterns or conventions, the prototype should honor them.
Data requirements: The prototype feels like its build on authentic customer data, not fake, placeholder data.
You can’t vibe your way into this. Building a good prototype requires similar planning to building real products.
For most PMs, this means developing a new muscle: data modeling. The design requirements and functional requirements come naturally. We’re used to writing specs and working with designers. But, we typically leave the data modeling to engineering.
Let’s see how we can use a data-driven approach to build a more authentic and flexible prototype. Detailed step-by-step instruction are included below. You can follow in Reforge Build or any other prototyping tool.
Need a live demo? Watch me walk through this on Claire Vo’s How I AI podcast:
Step 1: Generate realistic, structured data
We’ll actually start in Claude rather than Reforge Build. I’ve found Claude to be a great tool for generating mock data for two reasons: 1) its output feels very authentic and 2) Claude can work with a wide array of MCP servers (more on that below).
I asked Claude to generate data in JSON format. JSON (which stands for JavaScript Object Notation) is kind of like HTML for data… its a universal format that apps can understand which incorporates both the structure and content underlying the data.
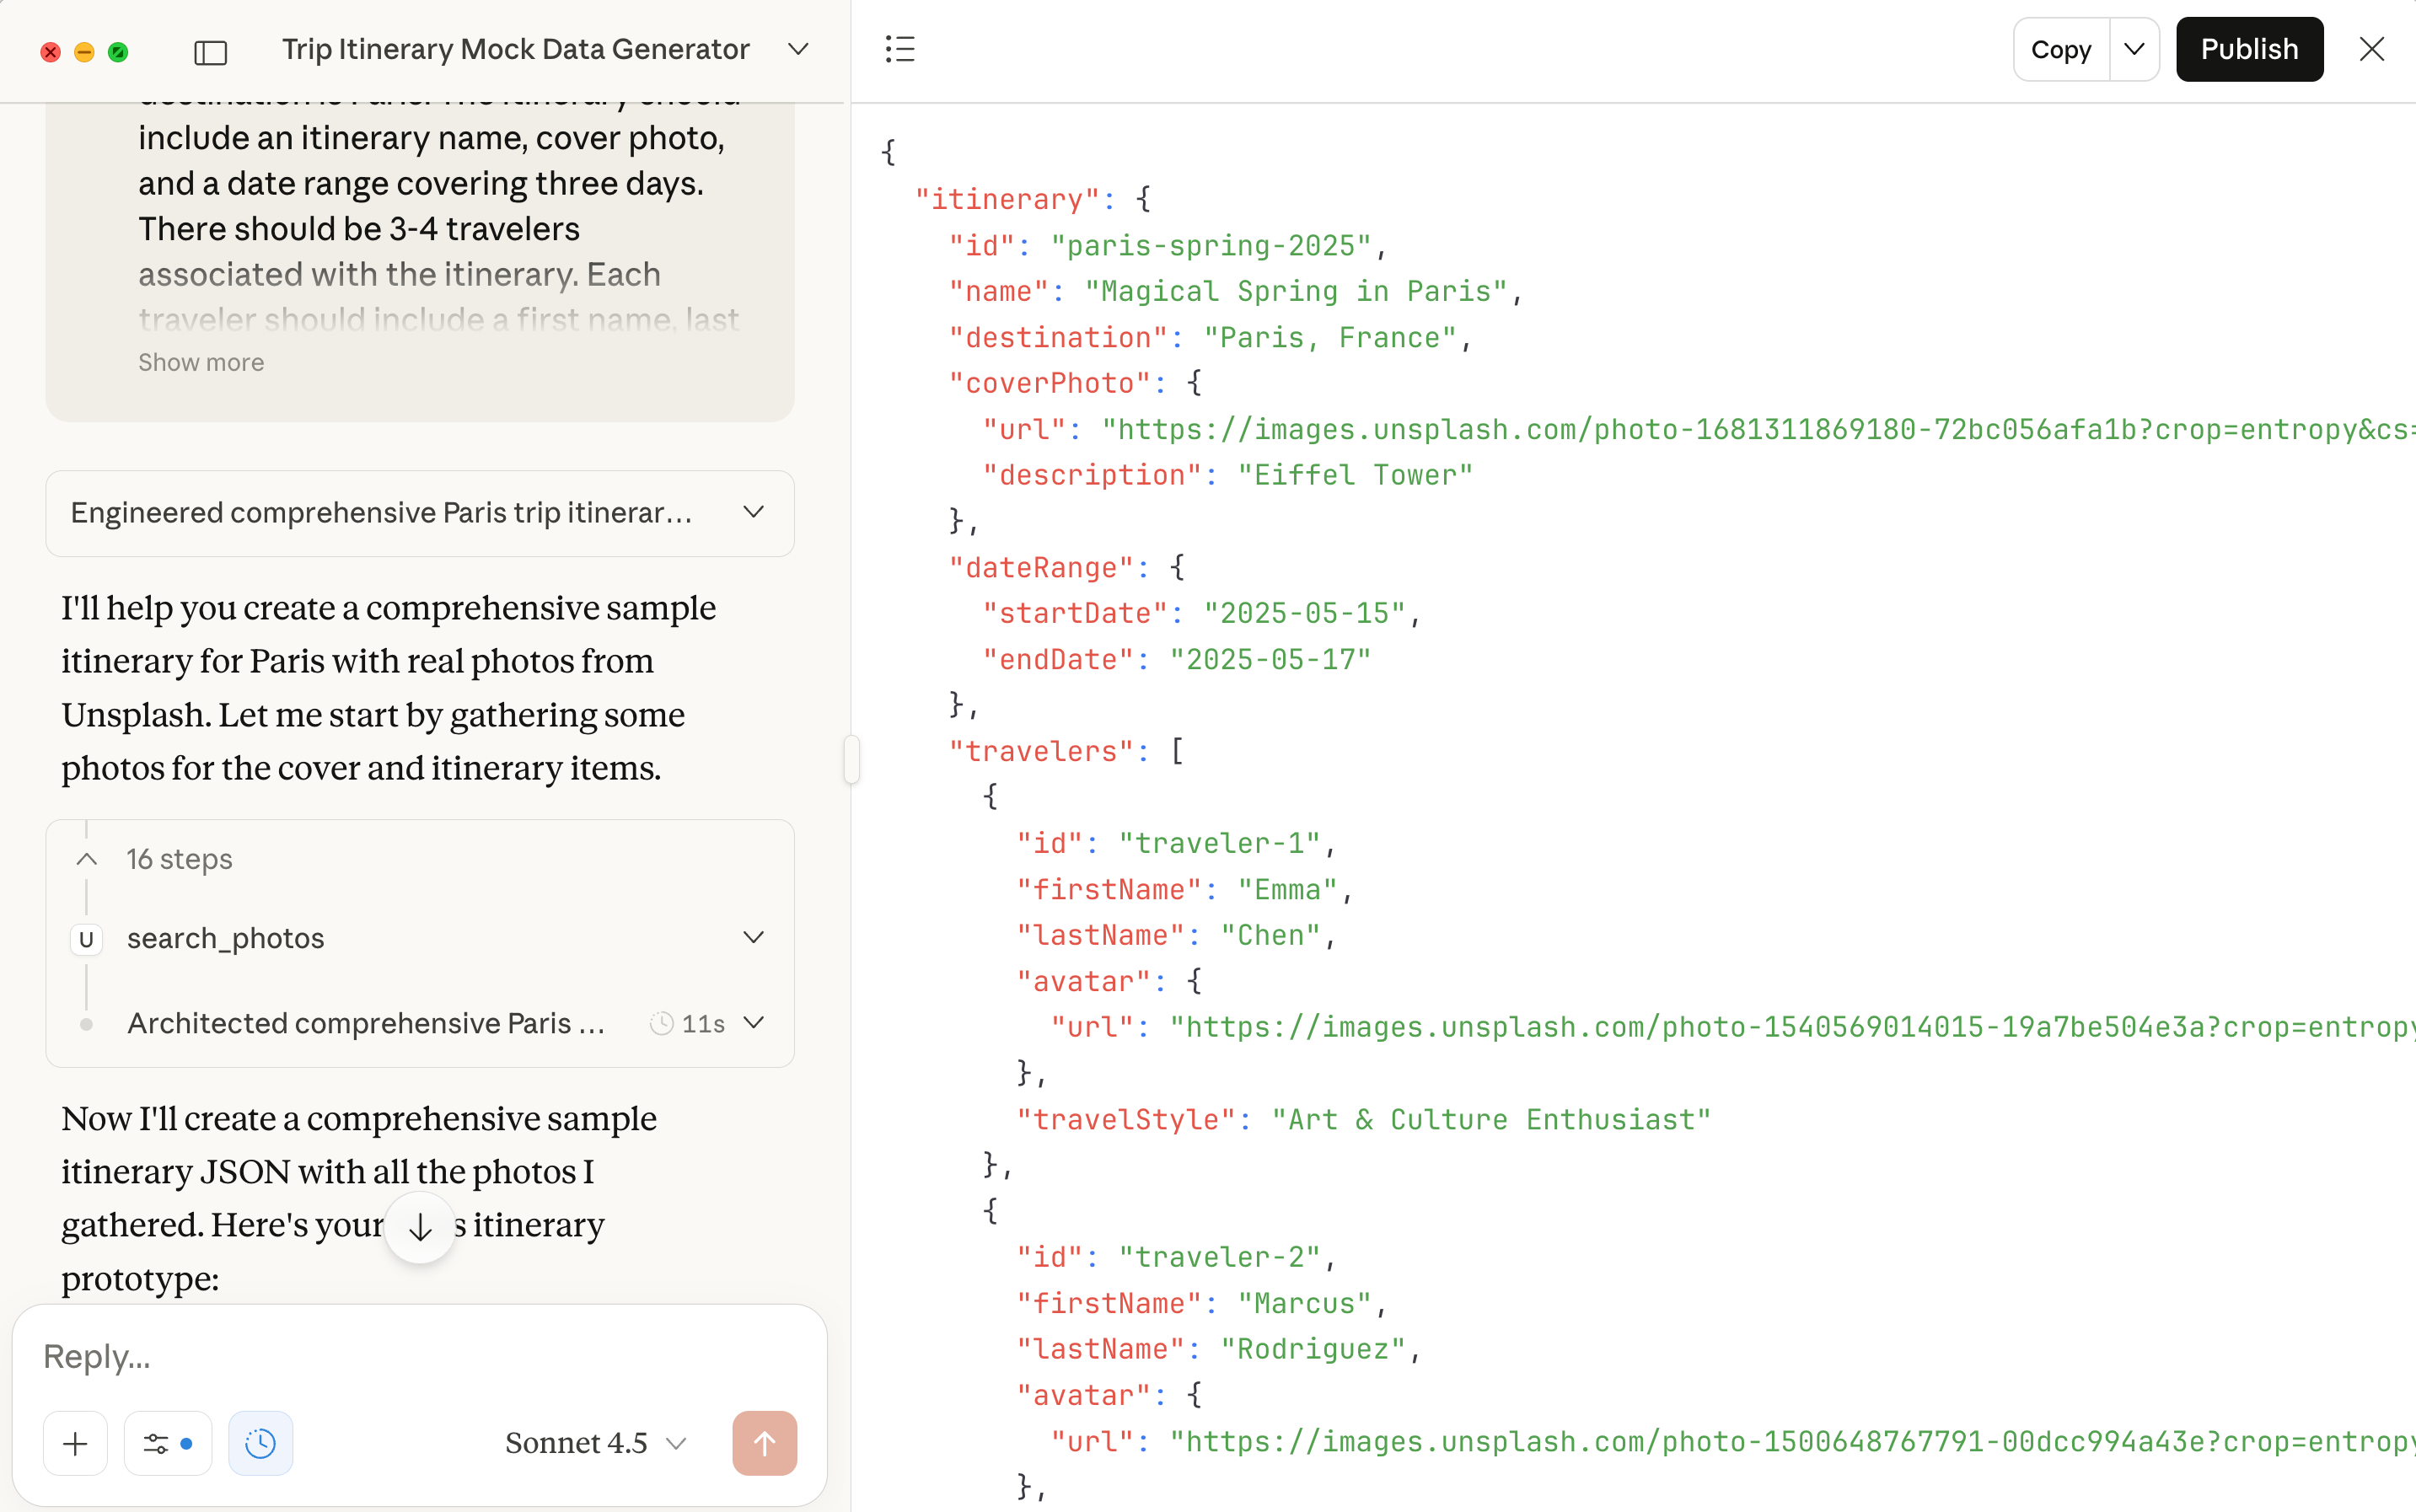
I used this prompt to generate the data:
Using JSON, generate a sample itinerary that I can use to prototype a shared trip itinerary feature. The destination is Paris. The itinerary should include an itinerary name, cover photo, and a date range covering three days. There should be 3-4 travelers associated with the itinerary. Each traveler should include a first name, last name, avatar photo, and preferred travel style like "Foodie", "History Buff", etc. For each day, include a collection things to see on each day. There should be 12-15 items in total. The items should a hotel for Day 1 and popular things to see (such as the Louvre or Eiffel Tower) on each subsequent day. Each item should include a name, a start time, a duration, a star rating, a number of reviews, tags to describe the item (like Historic Sites or Cultural Landmark), a photo, and a short description. Some items should have notes from one or more travelers. The notes should be in chronological order and respond to each other like a message thread for each itinerary item. Use unsplash-mcp-server to find photos for the cover photo, avatar photos, and itinerary items.The prompt is specific about what content we’re looking for. It also asks for imagery (for both people and places). This is thorny… LLMs don’t have reliable imagery data in their training sets. They’ll often hallucinate URL’s that don’t exist (leading to broken images) or pull in low-quality results.
We can solve for this by using an MCP server which allows Claude to access data from another source. In this case, I’m using the Unsplash MCP Server which takes a query (like “Eiffel Tower” or a hotel name) and returns actual URLs for relevant photos from Unsplash. This means our mock data gets real, high-quality images.
Generating the data takes a minute. Claude is generating complex JSON while making multiple API calls to Unsplash for every user and place generated. But the result is worth it: an incredibly detailed, authentic dataset with accurate image URLs.
💾 You can download the fill paris_itinerary_sample.json file here.
NOTE: Instead of generating mock data from scratch, you’ll likely be able to assemble it using anonymized data from your existing product.
Step 2: Generate the prototype from your data
Now, we’re ready to go back to our prototyping tool. Since we have structured data, the prompt is simple:
Generate a trip itinerary feature based on the sample data below:
[paste in the JSON data]
The data schema provides unambiguous context to the LLM… a rock solid foundation to build on. Now, your prototyping tool can focus purely on UX instead of juggling design, data modeling, content generation, and business logic simultaneously.
Sidebar: You can think about this as “rolling your own” multi-agent system. Here we’ve used two tools, Claude and Reforge Build, as subagents: one to create structured data and the other to build our prototype. The combination of two specialized “agents” (rather than one LLM working with a single context window) delivers much better results—and helps us avoid context rot.
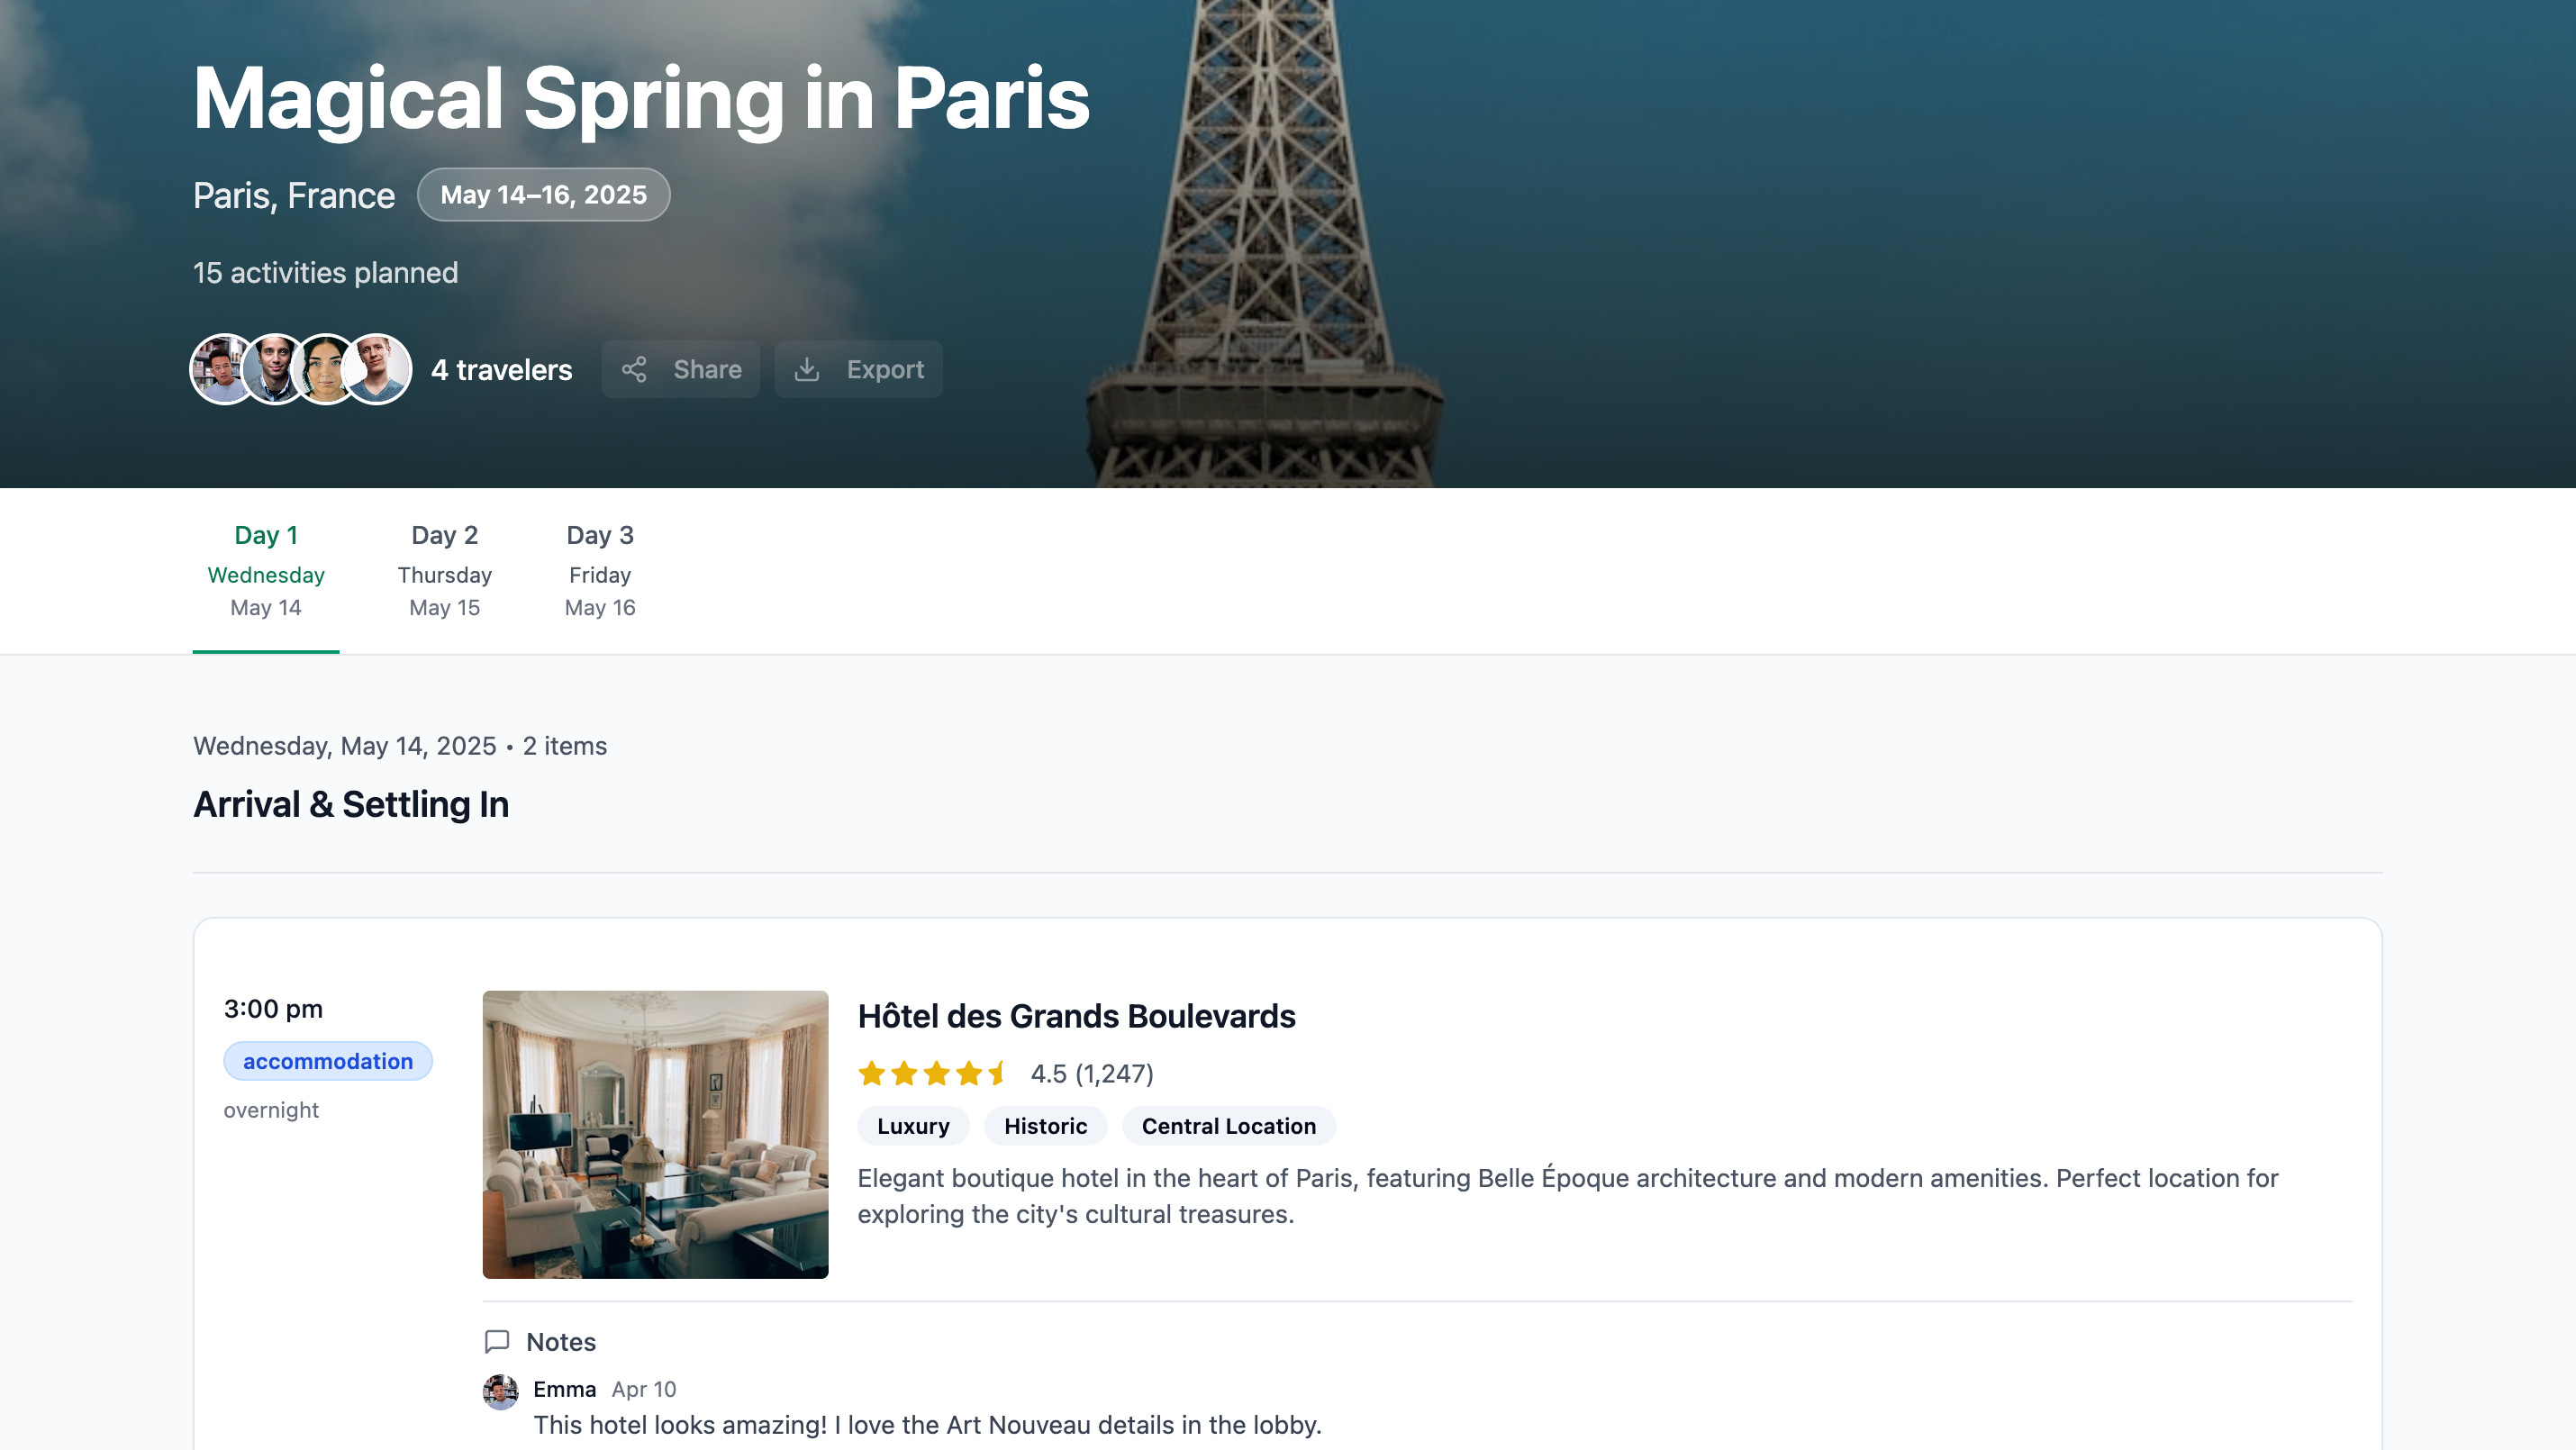
The result: A beautiful prototype with relevant photos. Detailed itineraries. Realistic traveler profiles. Message threads that sound like actual users. Something we can put in front of customer.
Here is what Reforge Build generated:
Step 3: Test & iterate
Here’s where the data-first approach pays off again. Reforge Build generates clean, modular code that maps directly to our data structure. This makes iteration faster and more reliable.
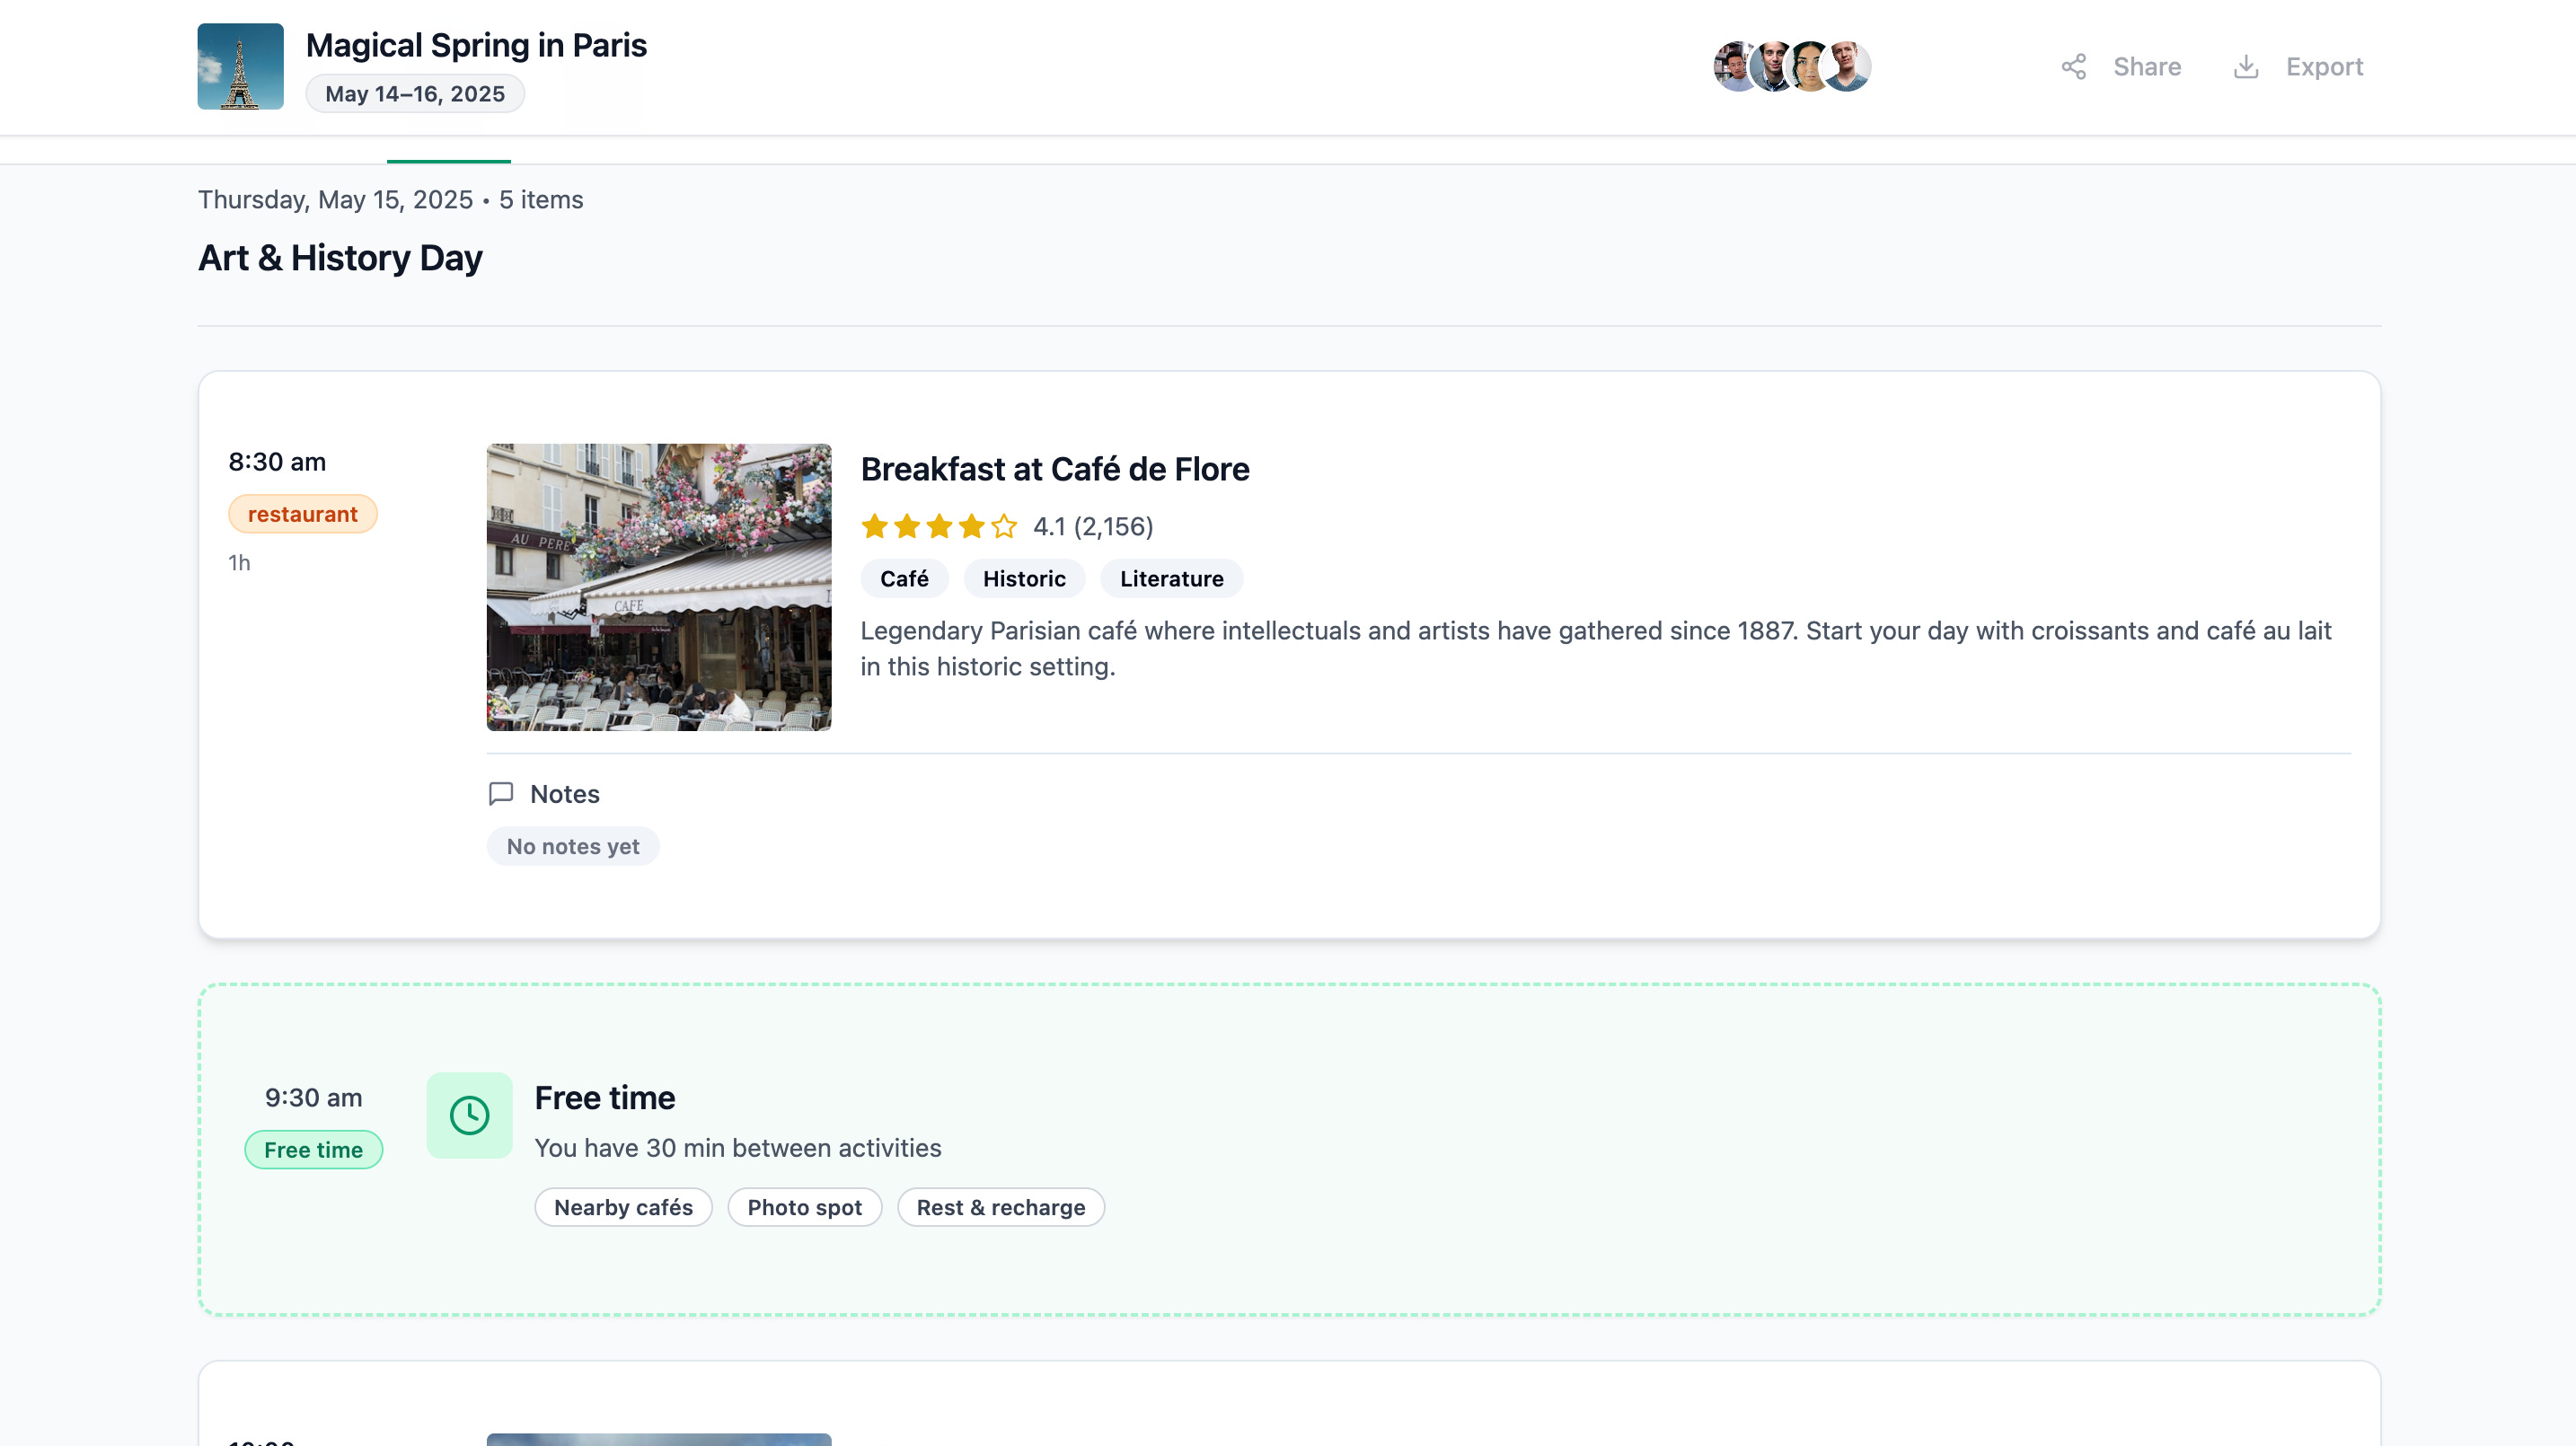
For example, we can easily add a feature to show gaps in the day:
Add blank cards if people have time in between activities. The result is dynamic based on the itinerary data (notice the prototype has calculated the start time and duration of the free block):
We can even go back into Claude and ask it to generate an entirely new itinerary based on the same data schema. The prompt in Claude is trivial:
Now generate an itinerary for the same travelers for a four day trip to Thailand.A few minutes later, we get an entirely new itinerary:
💾 You can download the fill thailand_itinerary_sample.json file here.
Updating the prototype is easy. The data is isolated from the rest of the prototype, making it easy to change directly and ensuring that changes flow cleanly to the rest of the app.
In Reforge Build, you can access the Code View to see all of the code that has been generated. In there, we'll find a file with the itinerary data (in this case, under data/itinerary.ts):
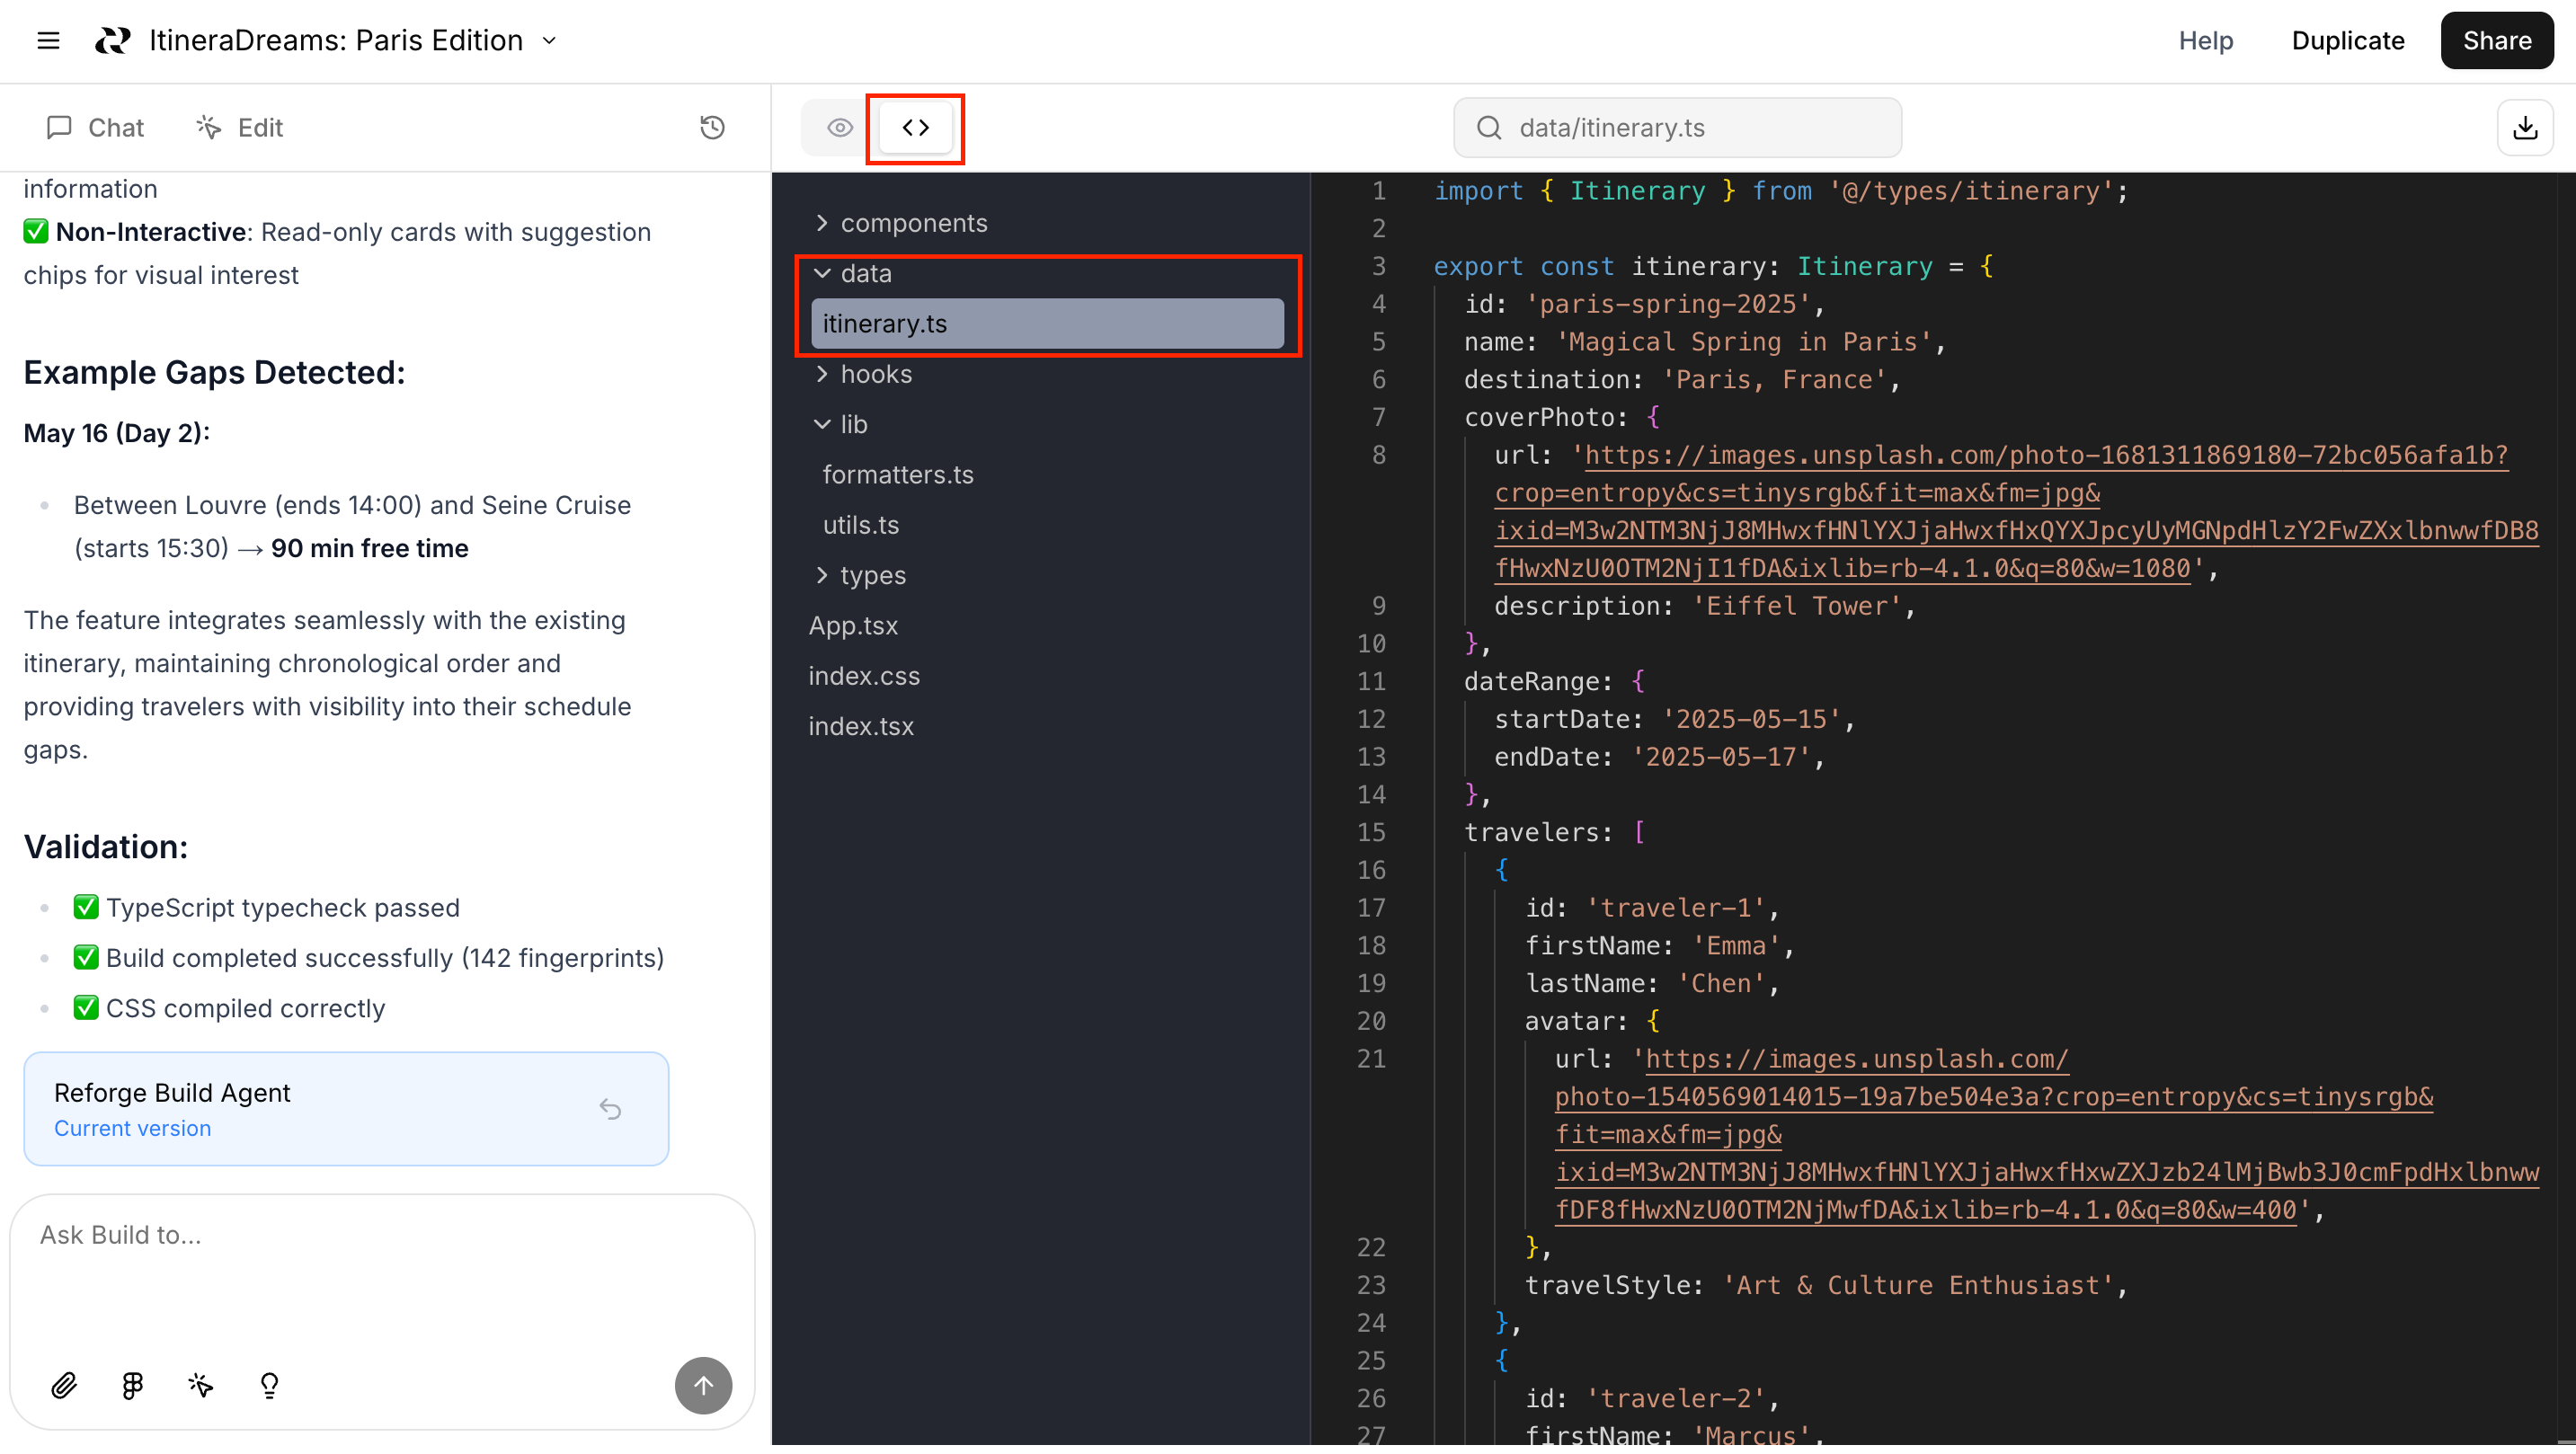
We can simply paste in the new JSON data and hit reload. Viola! We’re on our way to Bangkok:
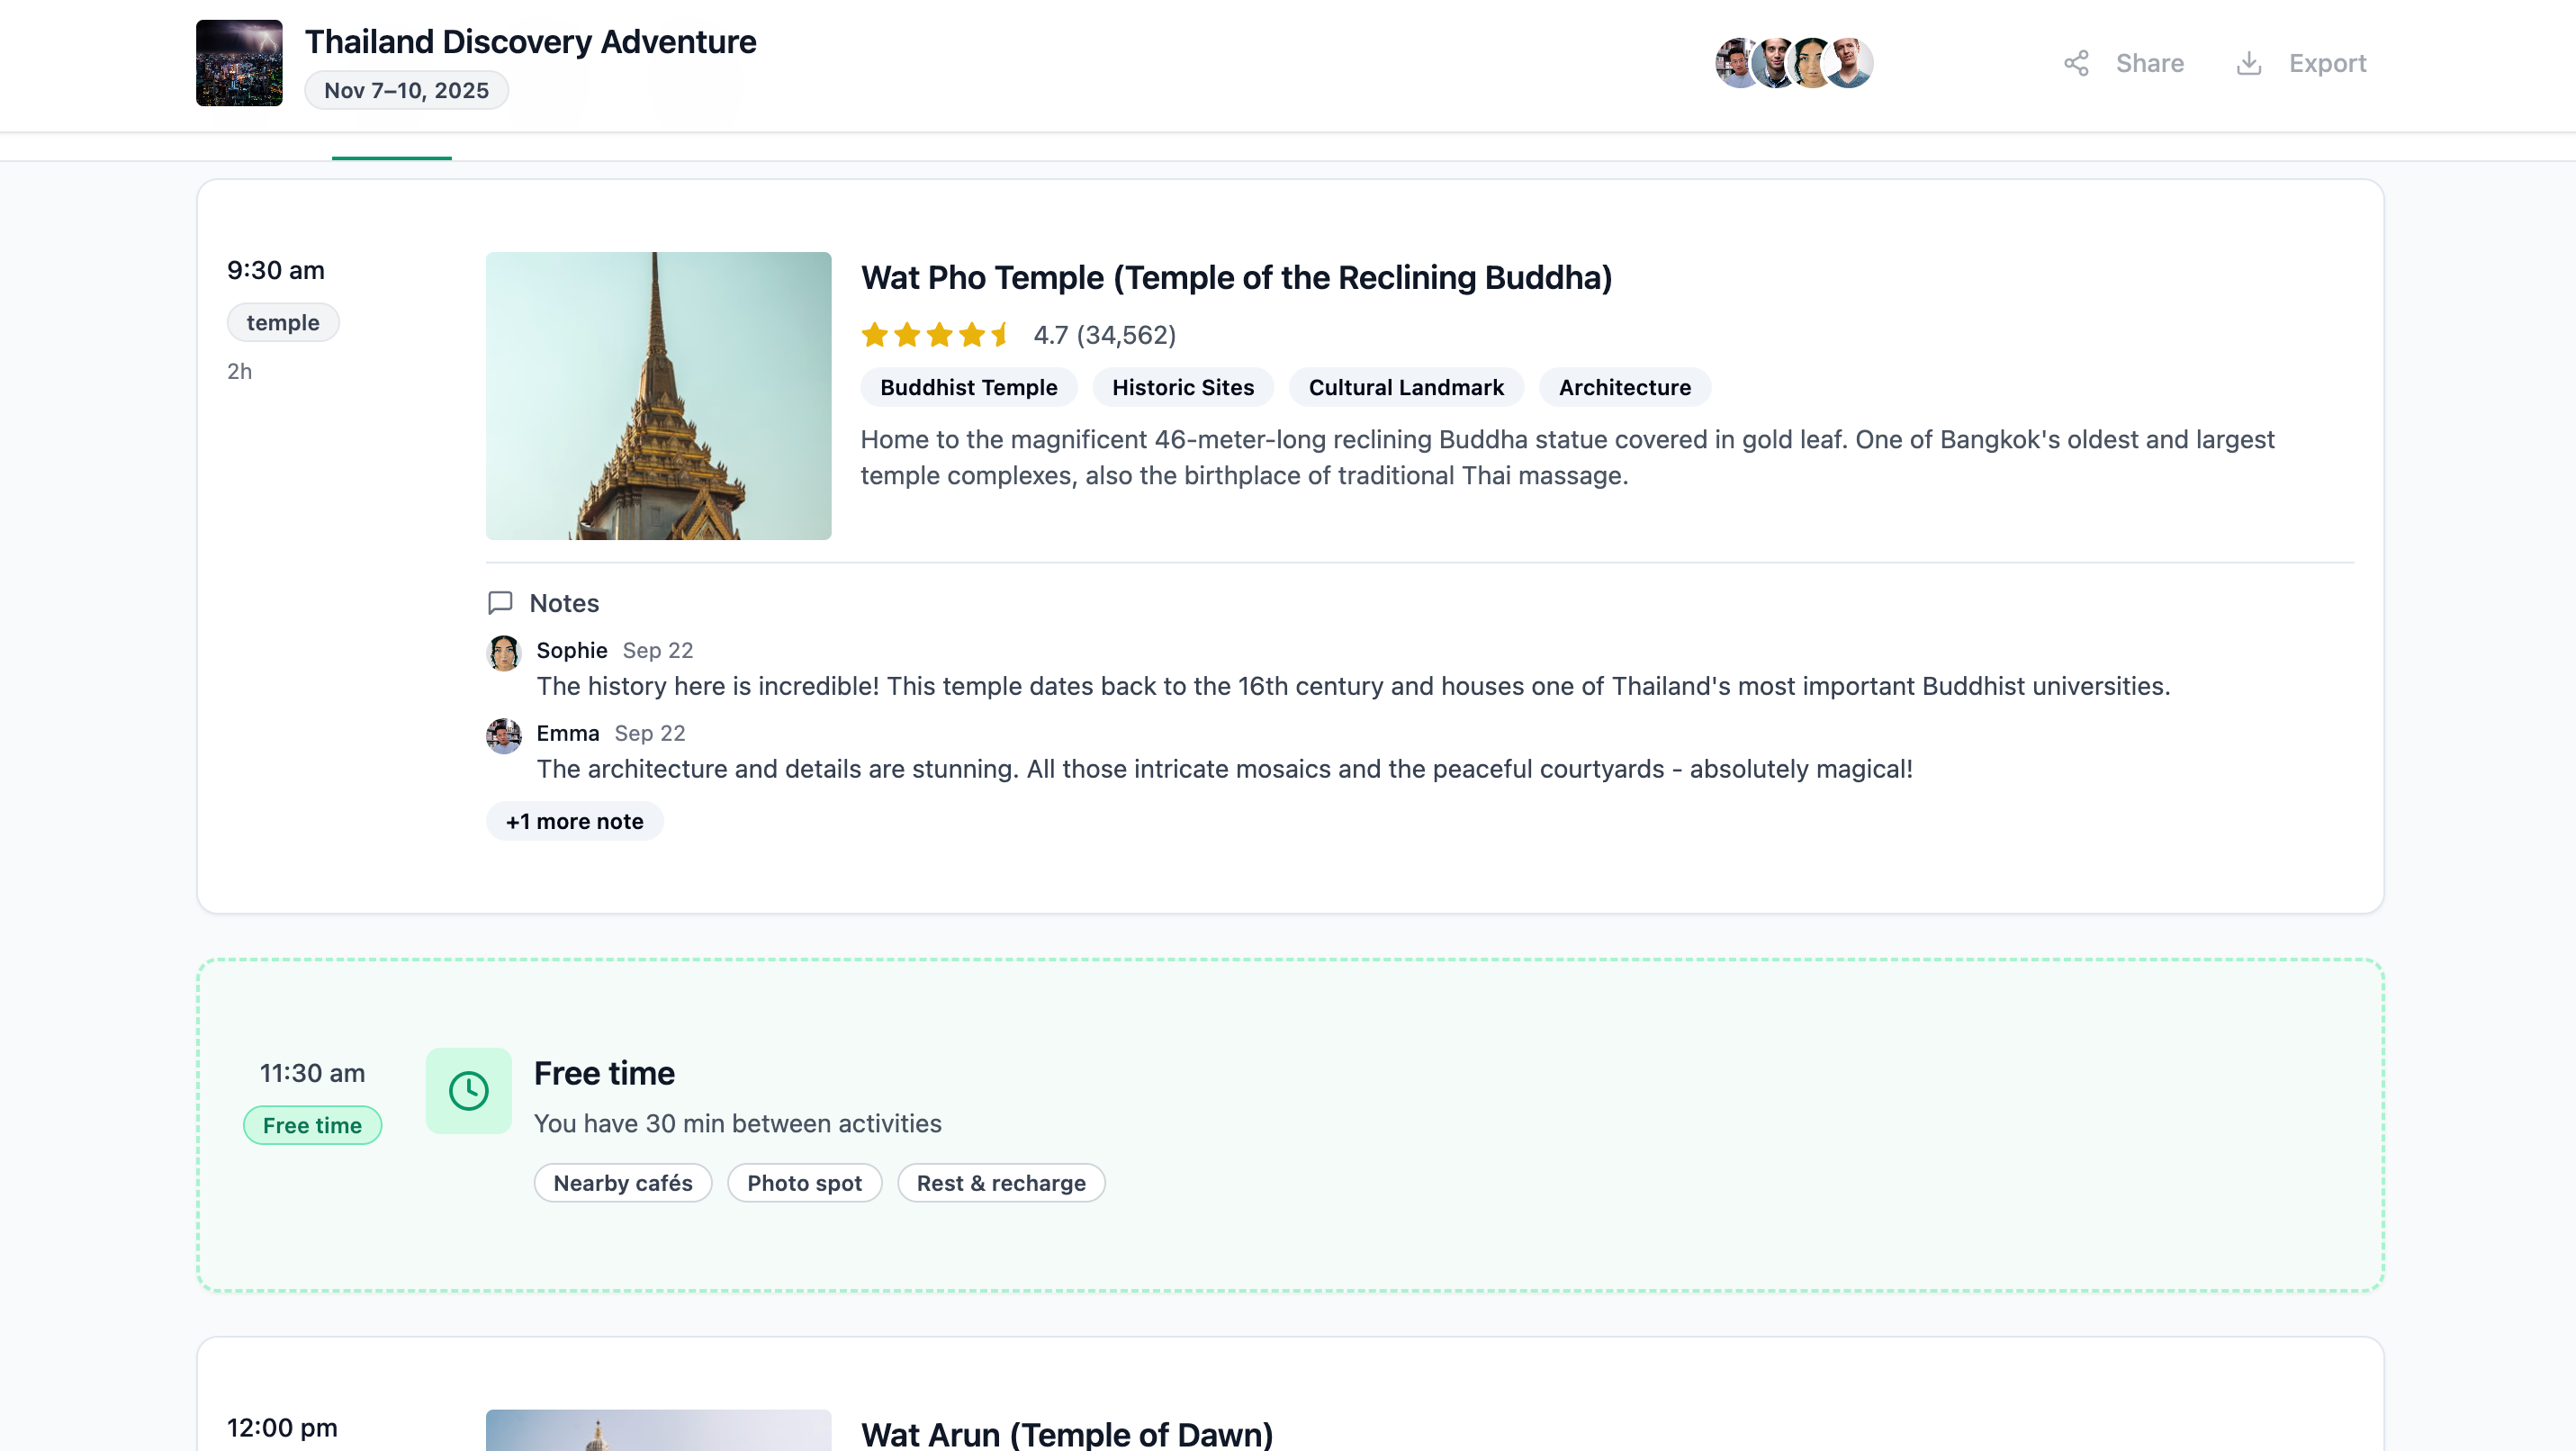
We now have a prototype that is flexible, reusable… and, most importantly, testable with real users across multiple scenarios.
Why this works (and what it means for your team)
Prototypes should be tools, not toys.
To live up to that promise, you need a sophisticated approach to prototyping that gives AI the context needed to build powerful, flexible, and authentic prototypes of your product.
Design, functionality, and data—the three legs of the stool—are each vital to building a strong prototype. Most teams have design and functional requirements covered. But data gets overlooked, and it’s the foundation.
By making data a first-class concern in your prototyping workflow, you’ll build believable prototypes you can put in front of users.
That’s the difference between a cool demo and a process that helps you ship better products.
Check out Reforge Build
The data-driven technique we discussed works with any prototyping tool. But that’s just the start. Product teams need a tool that fits into their workflow. Reforge Build is design to tap into established systems:
Design system. Start prototypes that match your design system using the browser extension, screenshots, or Figma integration
Knowledge system. Store customer feedback, product strategy, data schemas, and product docs at company and project levels
Discovery process. Create and compare multiple design variants simultaneously to explore different directions
Team collaboration. Share, comment, and remix prototypes directly. Turn any prototype into reusable templates for your team.
User research. Get customer feedback through Reforge Research AI interviews and surveys (coming soon)

These are great tips on how to be better at prototyping using ANY vibe coding tool, I really don't see the difference from other tools.
The essence is get the data, get the design and UX requirements in advance before starting to vibe code. Use them all wisely.
Thanks, Ravi. Once the prototype is done and validated, how do you hand this work over to the developers? Do you redesign it in Figma, or do you go with this? And what’s your opinion on using tools like Lovable or Replit to prototype and directly deliver it to the client as a product?